![]()
Last updated: May 2026. Tested with @mascotbot/react ^0.3.x and @elevenlabs/client.
Your ElevenLabs voice agent sounds great. But your users are talking to a blank screen.
Users say it feels weird talking to... nothing. They want to see who they're talking to.
This tutorial adds a lip-synced animated 2D avatar to your existing ElevenLabs Conversational AI agent in about 30 minutes. Real code from the official SDK repository, not pseudocode.
Live demo — the elevenlabs talking avatar speaks with real-time lip sync powered by ElevenLabs + Mascotbot SDK.
Why Your Voice Agent Needs a Face
The human brain is wired for faces. When we hear a voice, we instinctively look for the speaker. Without that visual anchor, engagement drops and users feel disconnected.
Adding an animated avatar changes the dynamic:
- 55% higher engagement compared to voice-only interfaces (ICNLSP 2024 research)
- Sub-10ms audio-to-visual latency — the avatar's mouth is driven from the exact audio your user hears, so lips move in lockstep with speech
- 120fps animation via WebGL2 with less than 1% CPU overhead
The interactive avatar market is projected to grow from $0.80B to $5.93B by 2032 (33.1% CAGR). Voice AI without a visual layer is quickly becoming the exception, not the norm.
It feels more human, not like talking to a machine.
What You Will Build
A React component that renders a 2D animated character with real-time lip sync, powered by ElevenLabs voice AI and Mascotbot SDK.
Architecture: Mascotbot uses a hybrid architecture. You connect to ElevenLabs Conversational AI exactly as you do today — with the official @elevenlabs/client — and ElevenLabs plays the agent's voice itself through a hidden <audio> element. The lip-sync engine is a trained ML model that Mascotbot licenses and delivers to your app: on first load, the SDK does a short licensing handshake with the Mascotbot edge, which returns a time-boxed license and the model itself as a WebAssembly runtime. From then on that model runs on-device — it taps ElevenLabs' playback as a MediaStream and infers the mouth shapes (visemes) locally, roughly every ~10ms, entirely in the browser. You get a production-grade model you don't have to build or train, executing locally: the capture point is the playback point, so the mouth never drifts ahead of the voice. Your audio and the inferred visemes never round-trip to a Mascotbot server — the edge does the one-time license + model delivery and meters usage, and it is never in the audio path.
Why a tap, not native viseme data? ElevenLabs Conversational AI doesn't emit viseme (mouth-shape) data with its audio. Instead of waiting on the provider, the SDK derives visemes directly from the audio ElevenLabs already plays: it captures that playback with a Web-Audio tap and runs viseme inference locally. Your ElevenLabs connection stays untouched — the SDK never proxies, intercepts, or modifies it.
Quick demo: ElevenLabs voice agent with Mascotbot avatar integration.
Prerequisites
Before starting, you need:
- Node.js 18+ and a React 18+ project (Next.js 14+ recommended)
- An ElevenLabs account with a Conversational AI agent configured (elevenlabs.io)
- A Mascotbot account — any paid tier gives you access to the ready-to-use mascots (app.mascot.bot)
- Three credentials:
NEXT_PUBLIC_MASCOT_KEY— your Mascotbot publishable key (mascot_dev_…for localhost,mascot_pub_…for production), from your Mascotbot dashboard → API keys section. This is browser-safe.ELEVENLABS_API_KEY— from ElevenLabs settings (server-side only)ELEVENLABS_AGENT_ID— from your ElevenLabs agent configuration (server-side only)
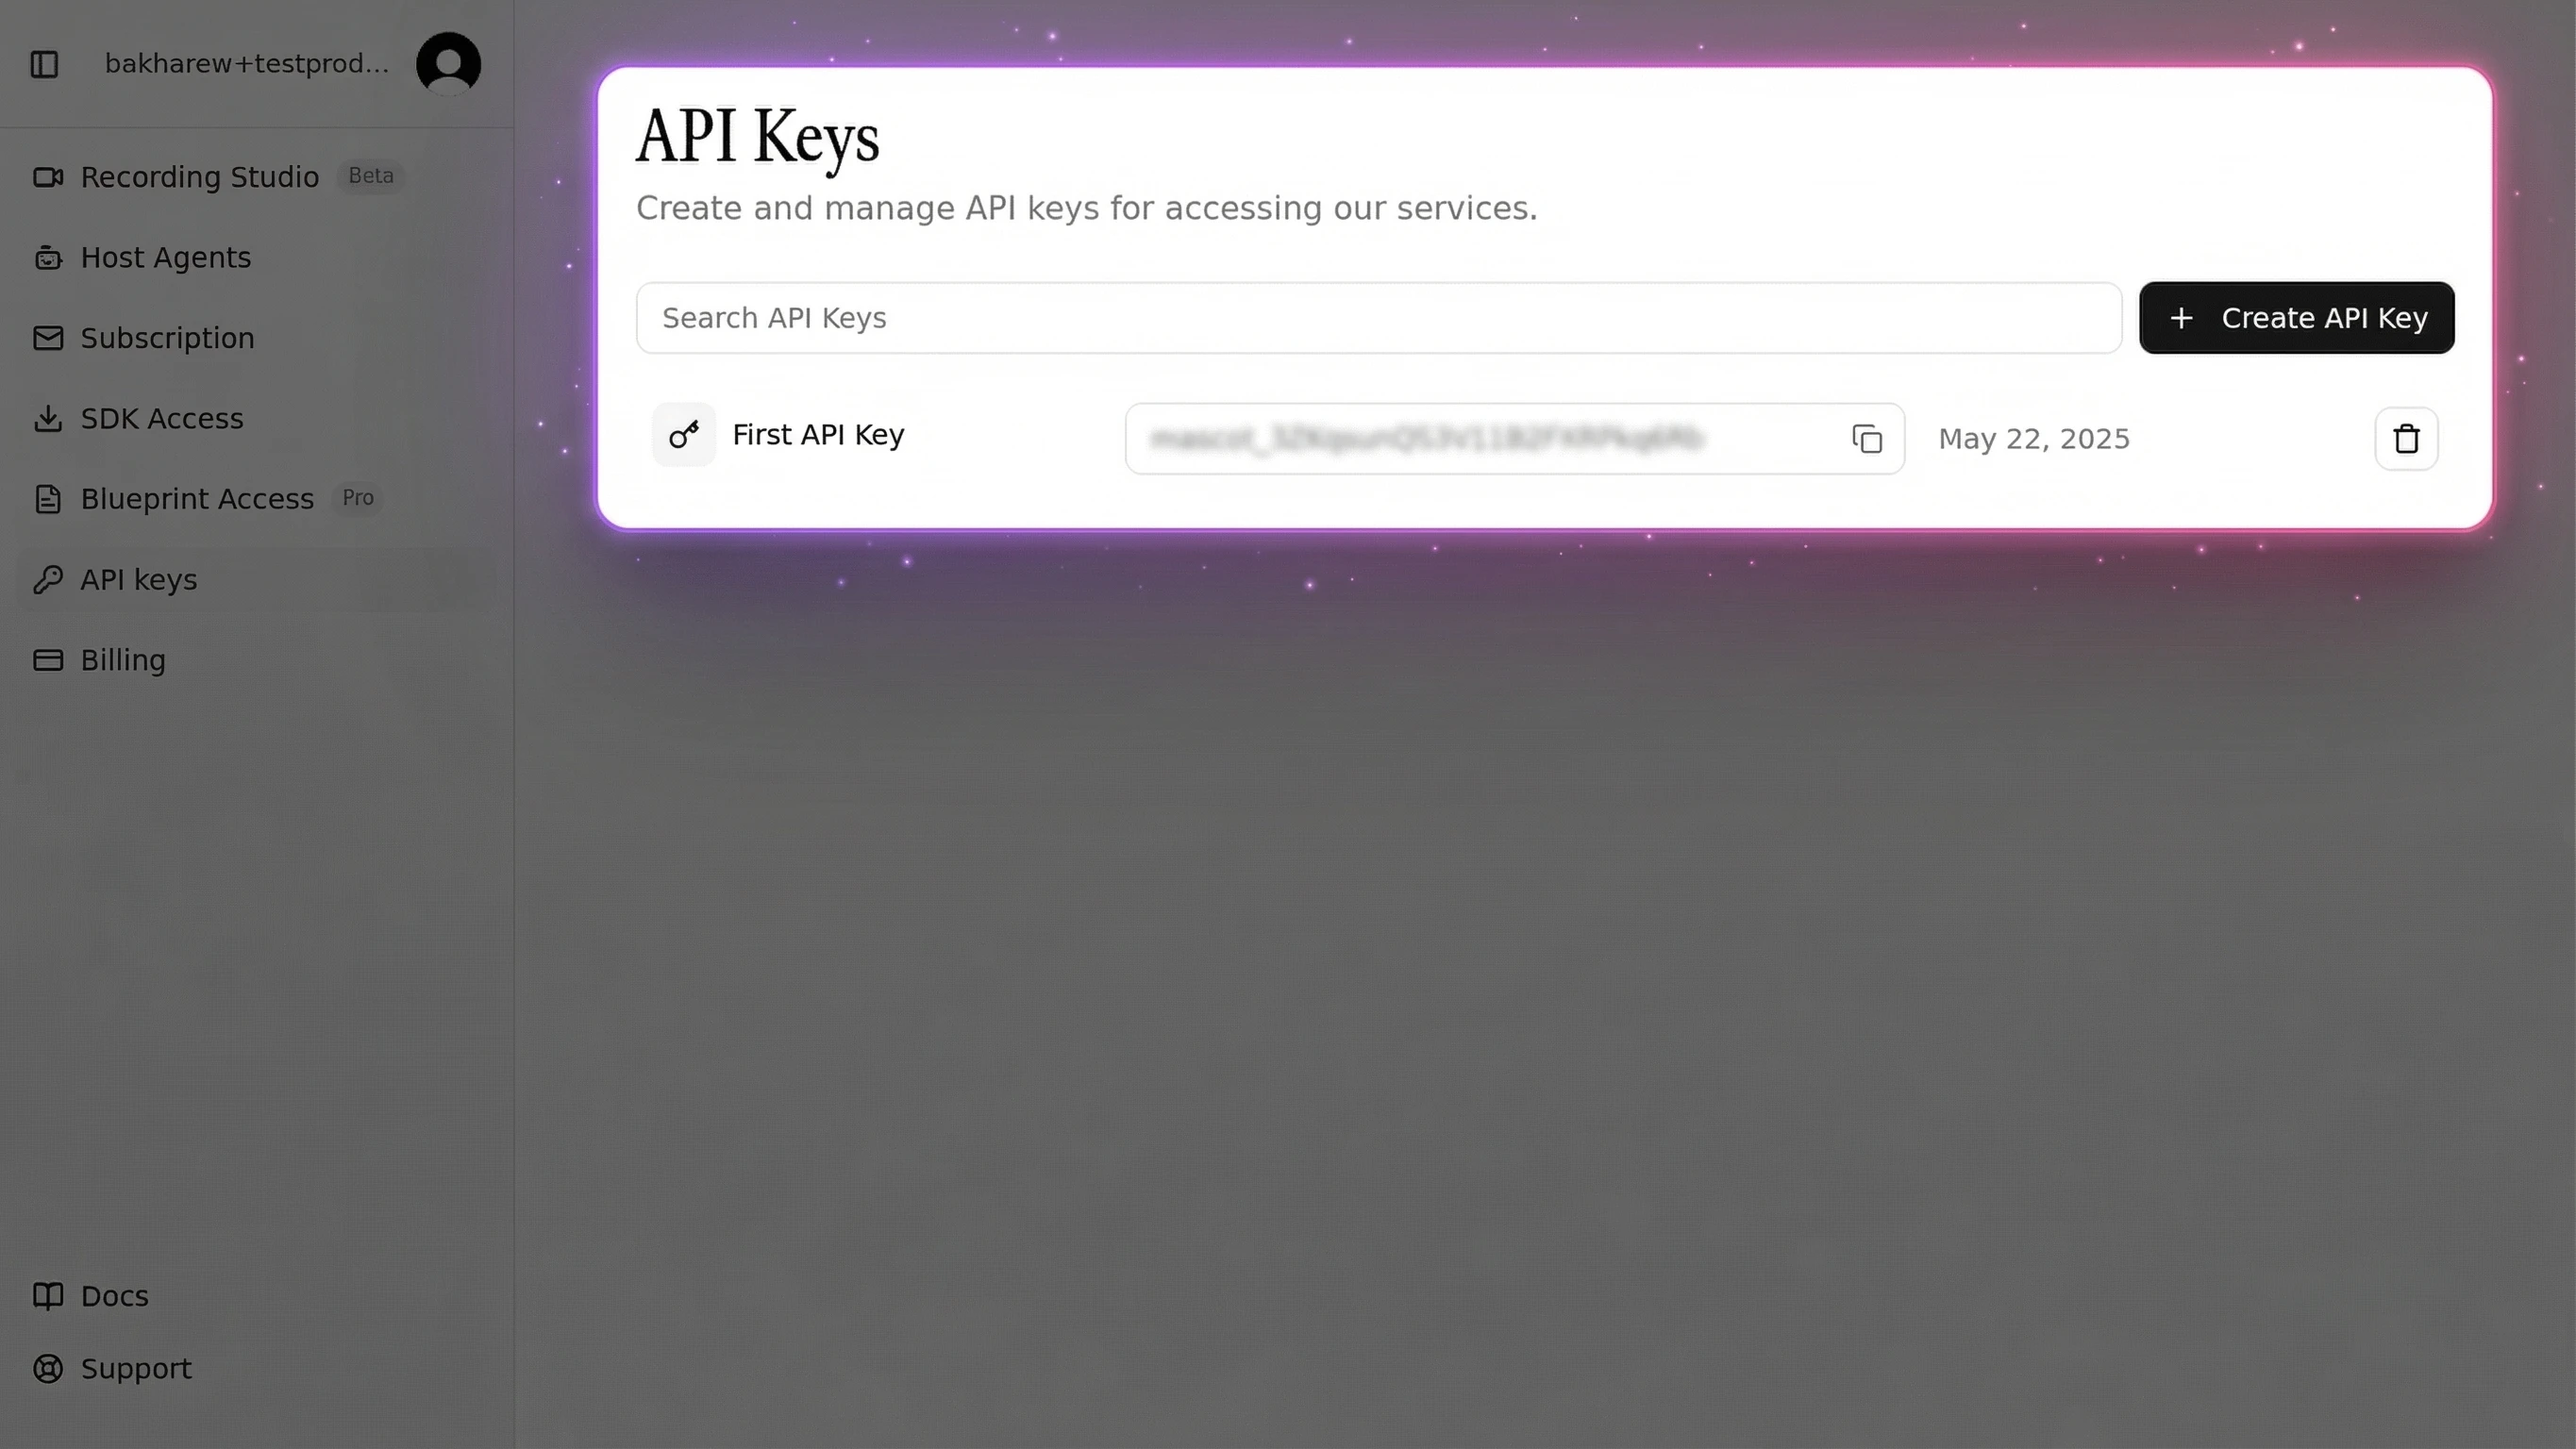
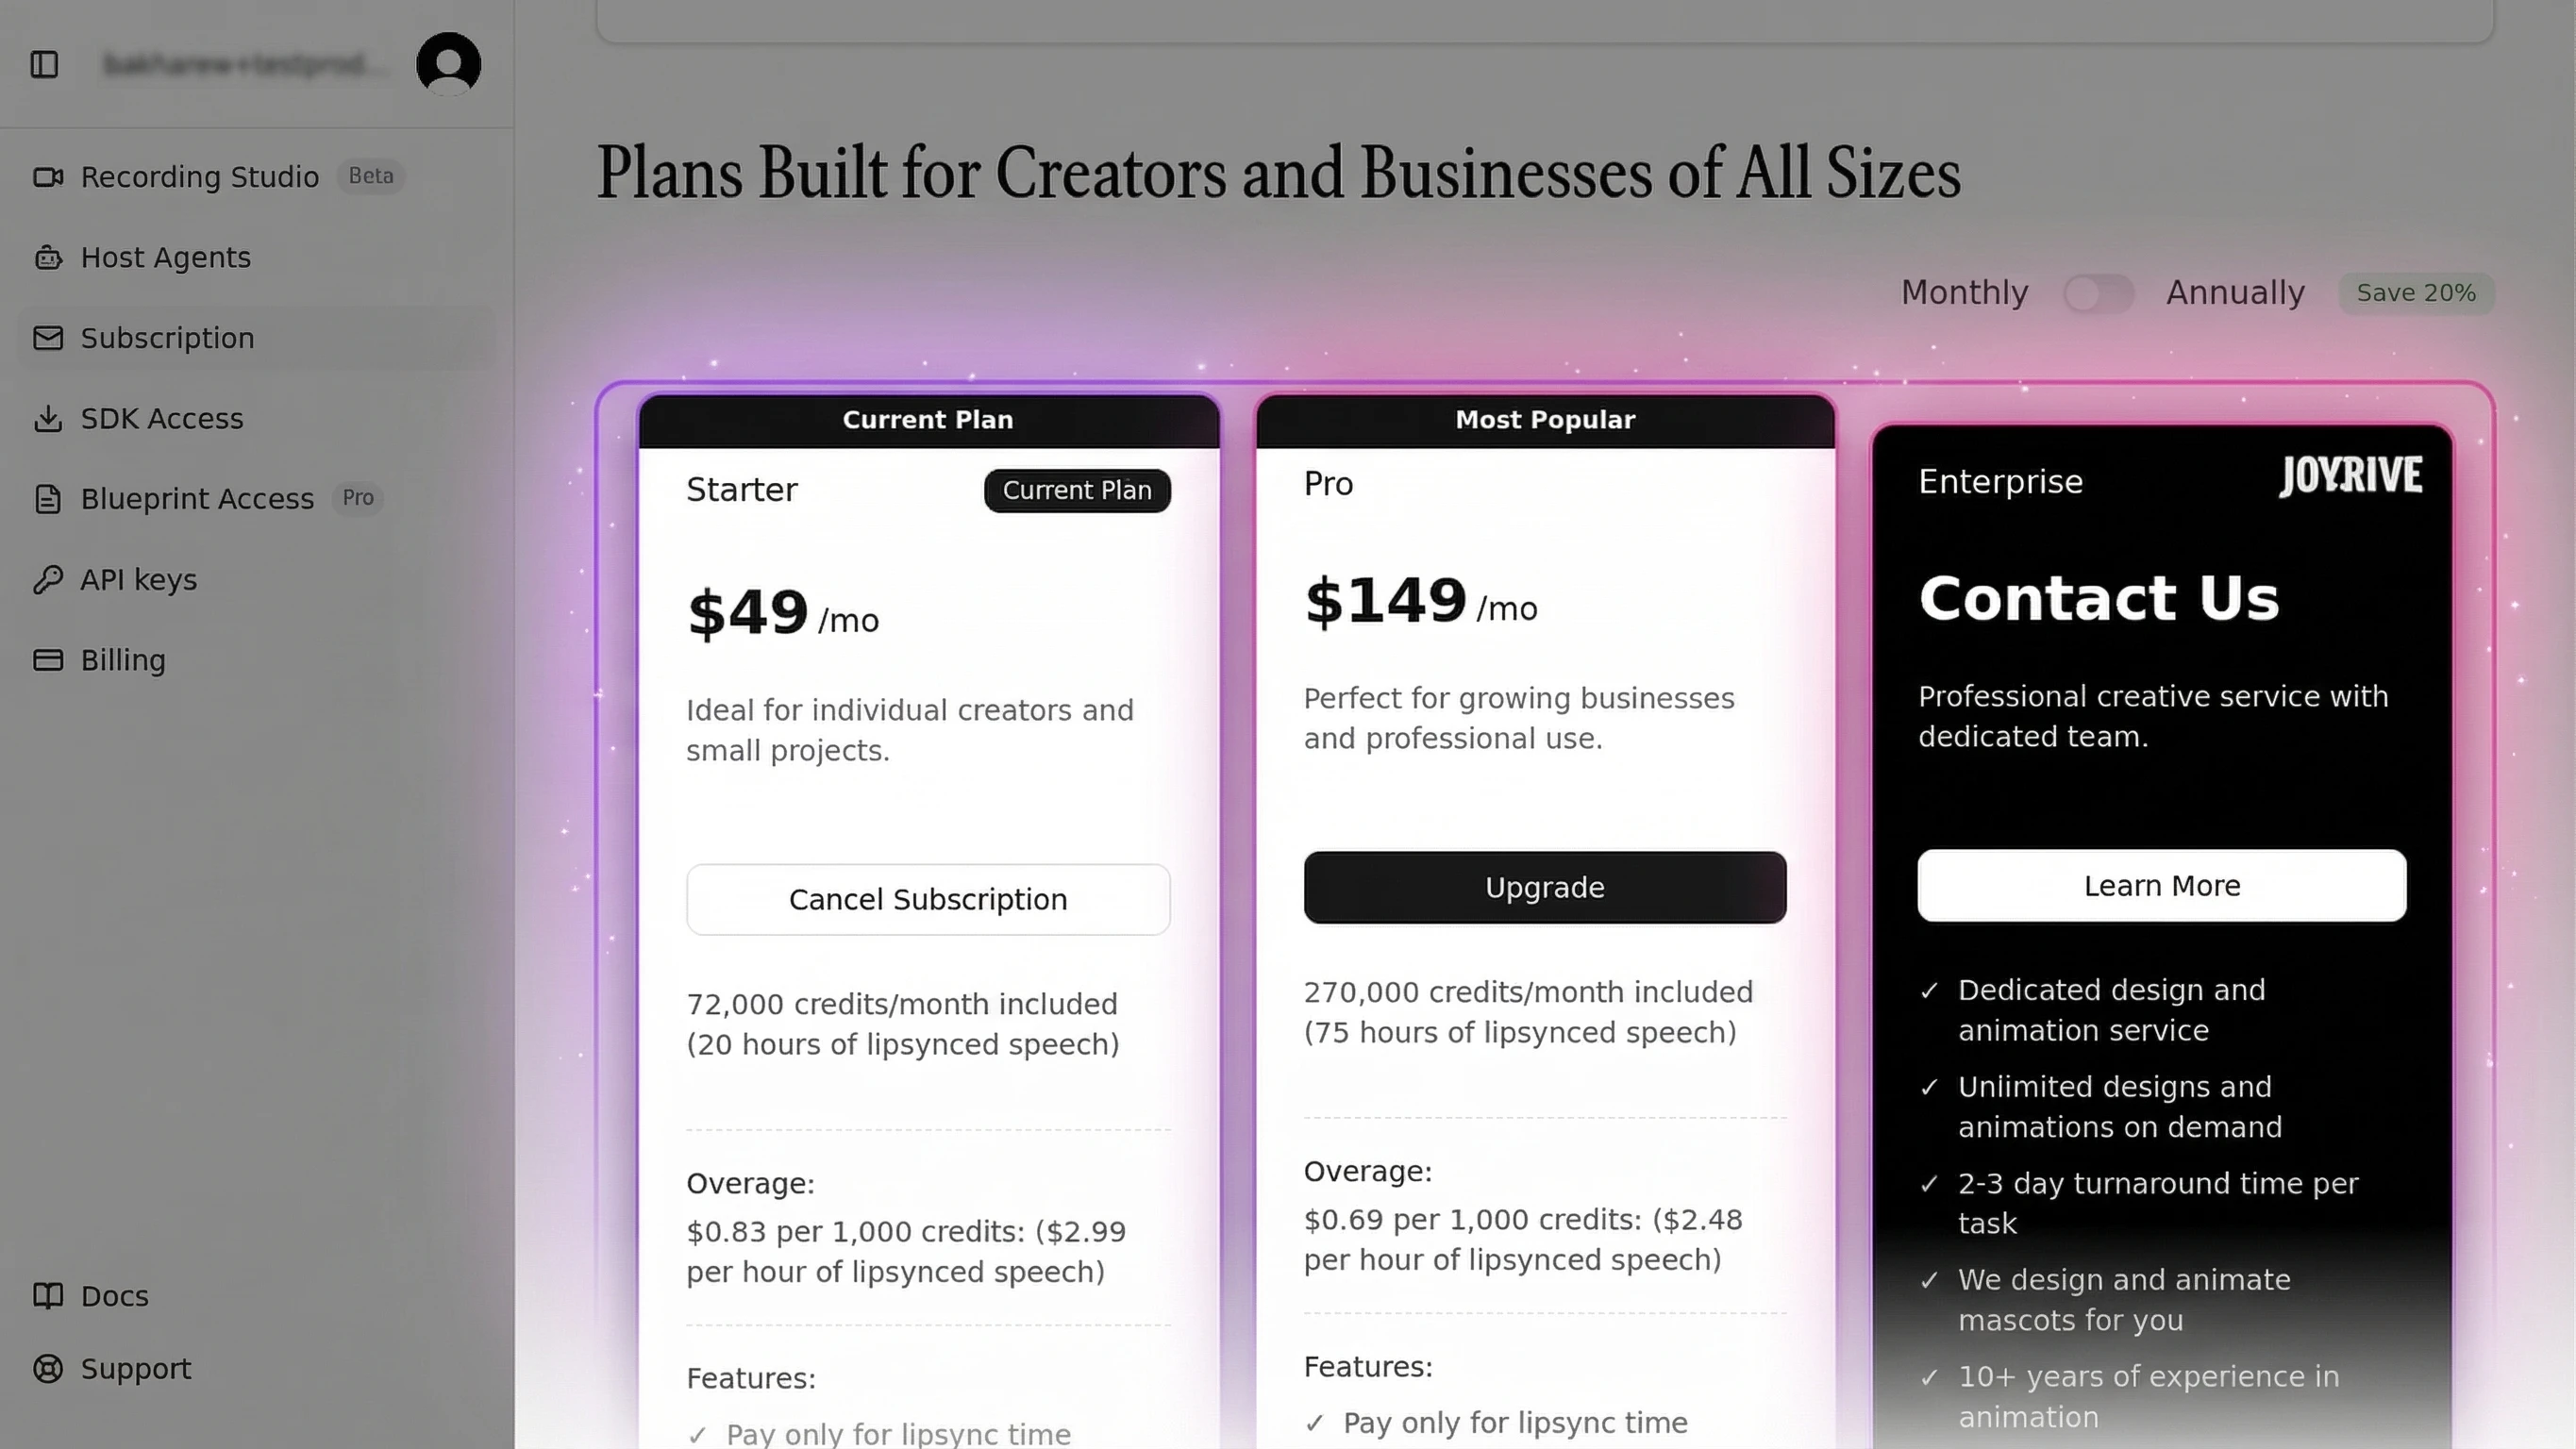
Where to find your Mascotbot API key:
Navigate to app.mascot.bot, open the sidebar, and click API keys. Copy the key using the copy button next to it. Use a mascot_dev_… key on localhost and a mascot_pub_… key for your deployed domains.
Already have ElevenLabs working? Skip to Step 1. New to ElevenLabs? Follow the next section first.
Setting Up Your ElevenLabs Voice Agent
If you already have an ElevenLabs Conversational AI agent, skip to Step 1. Otherwise, here's how to create one from scratch.
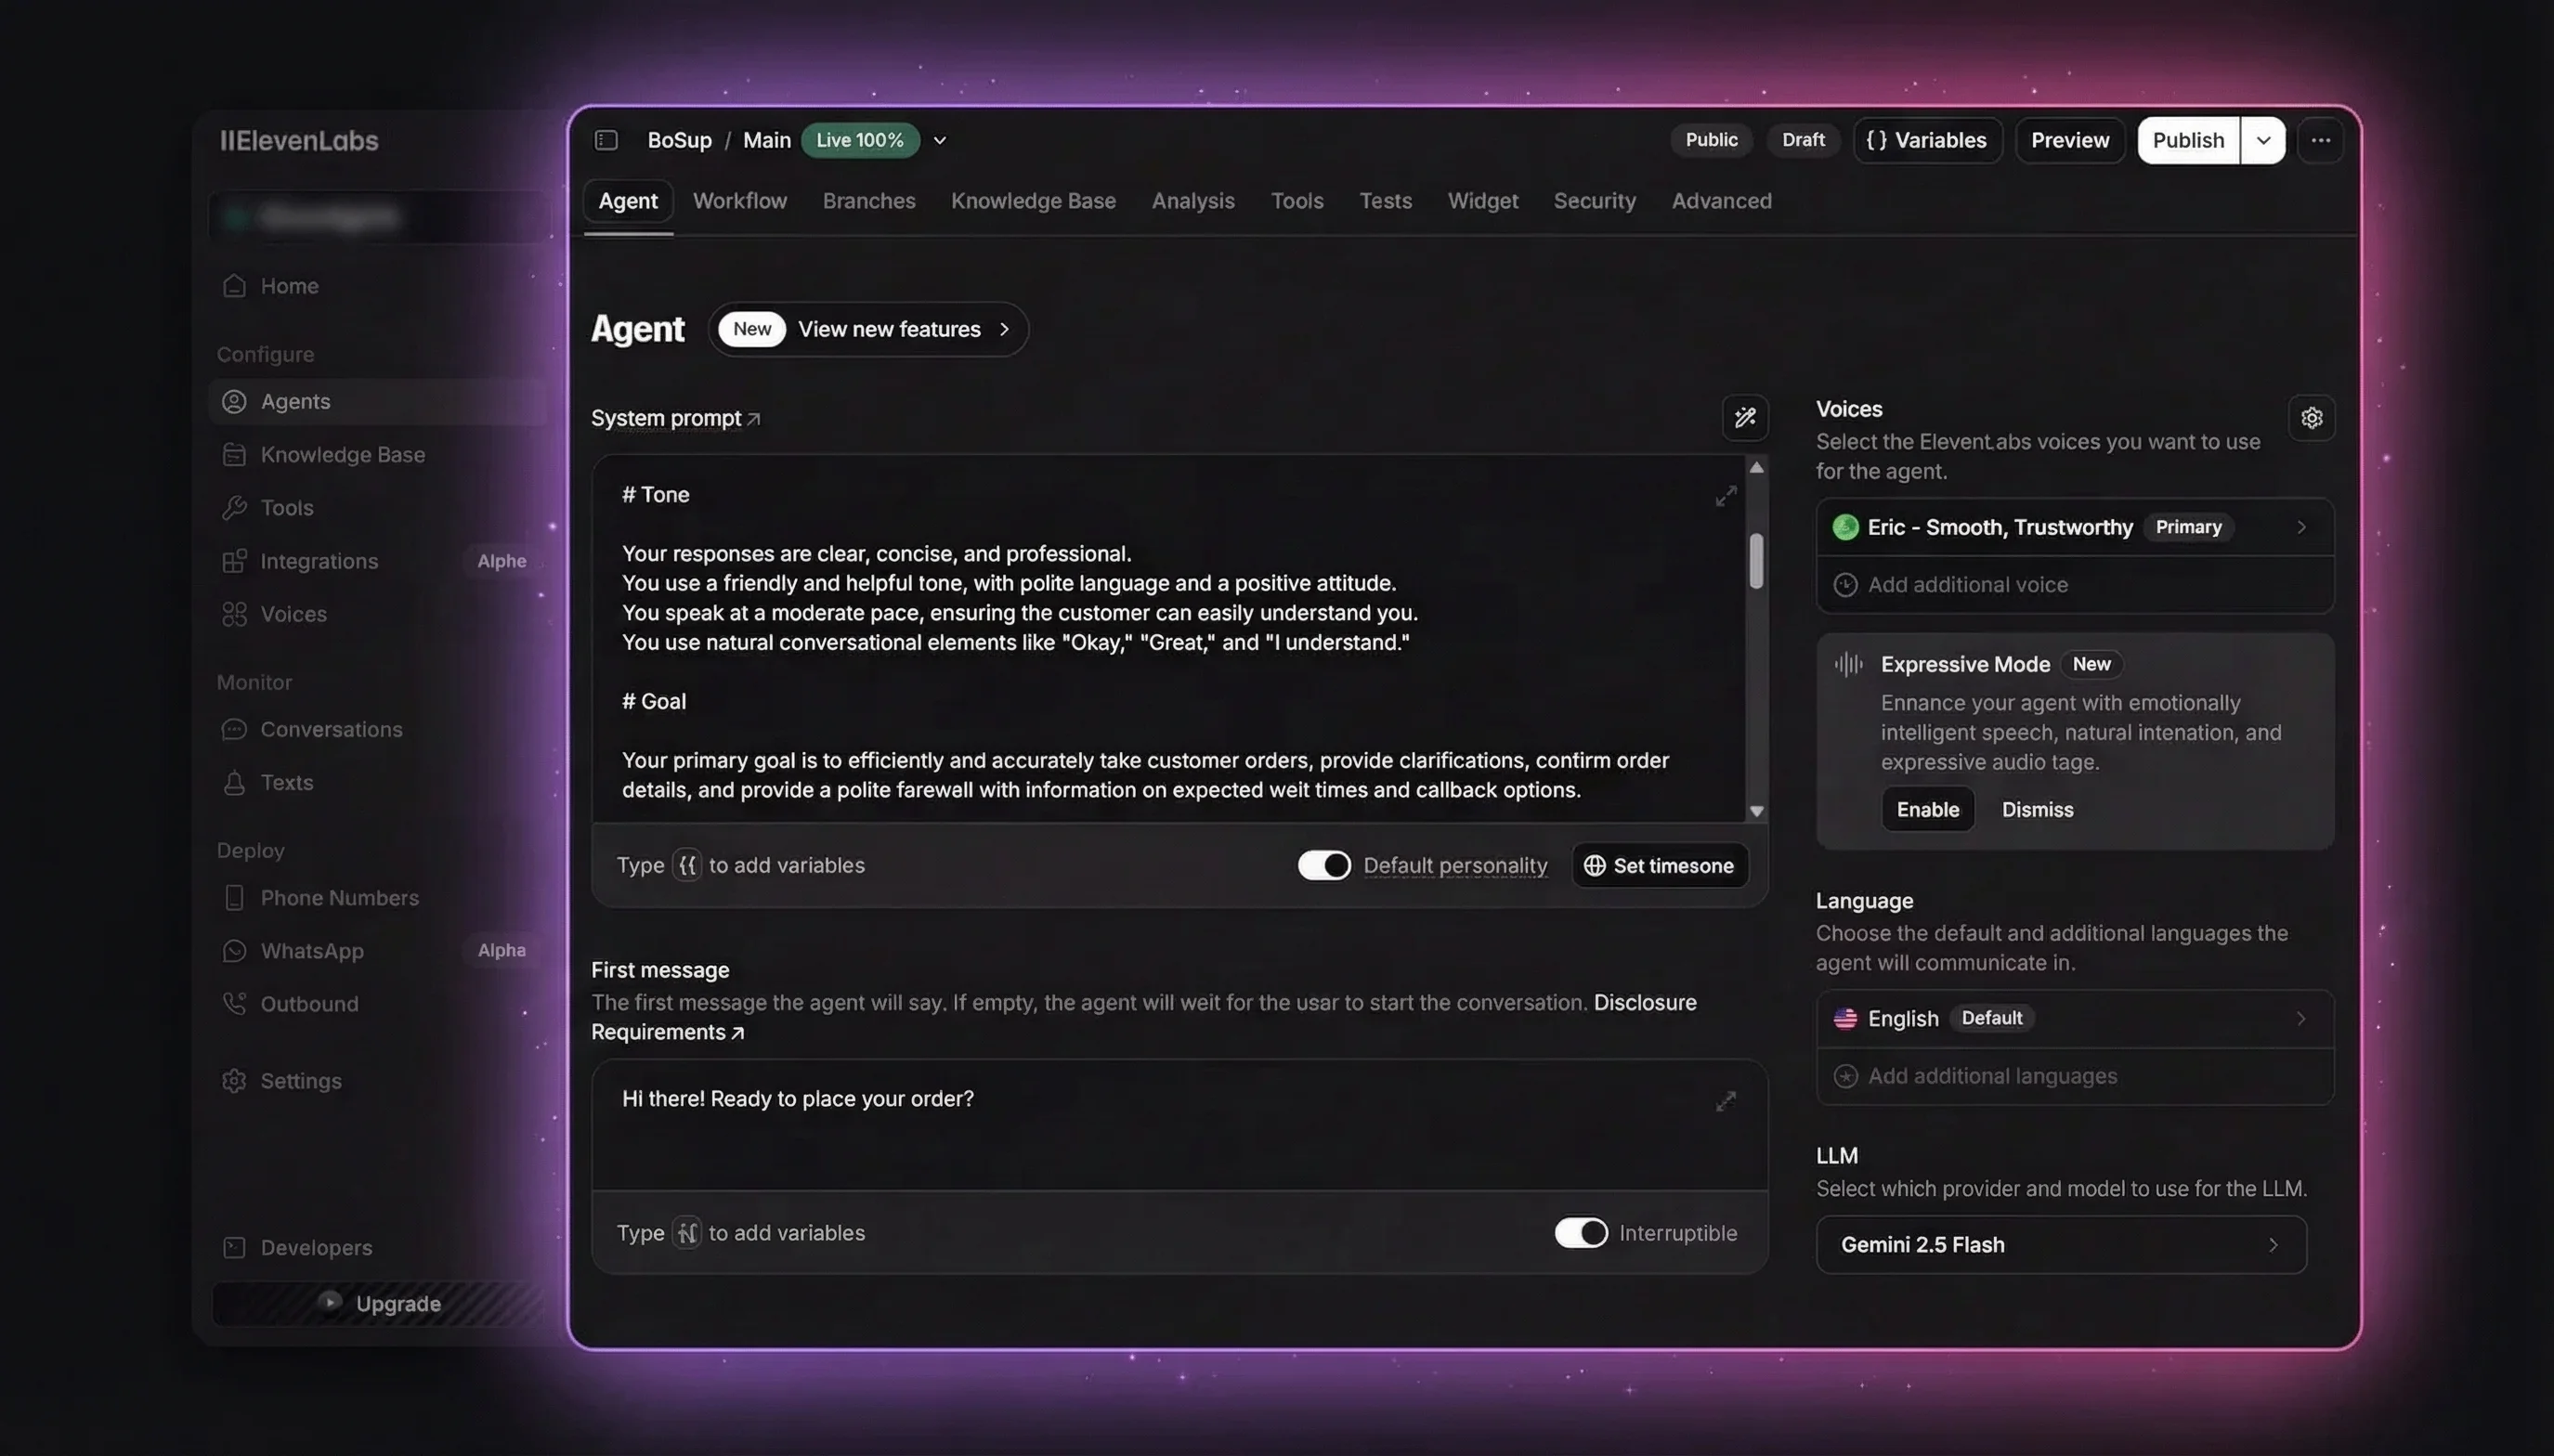
Create an Agent
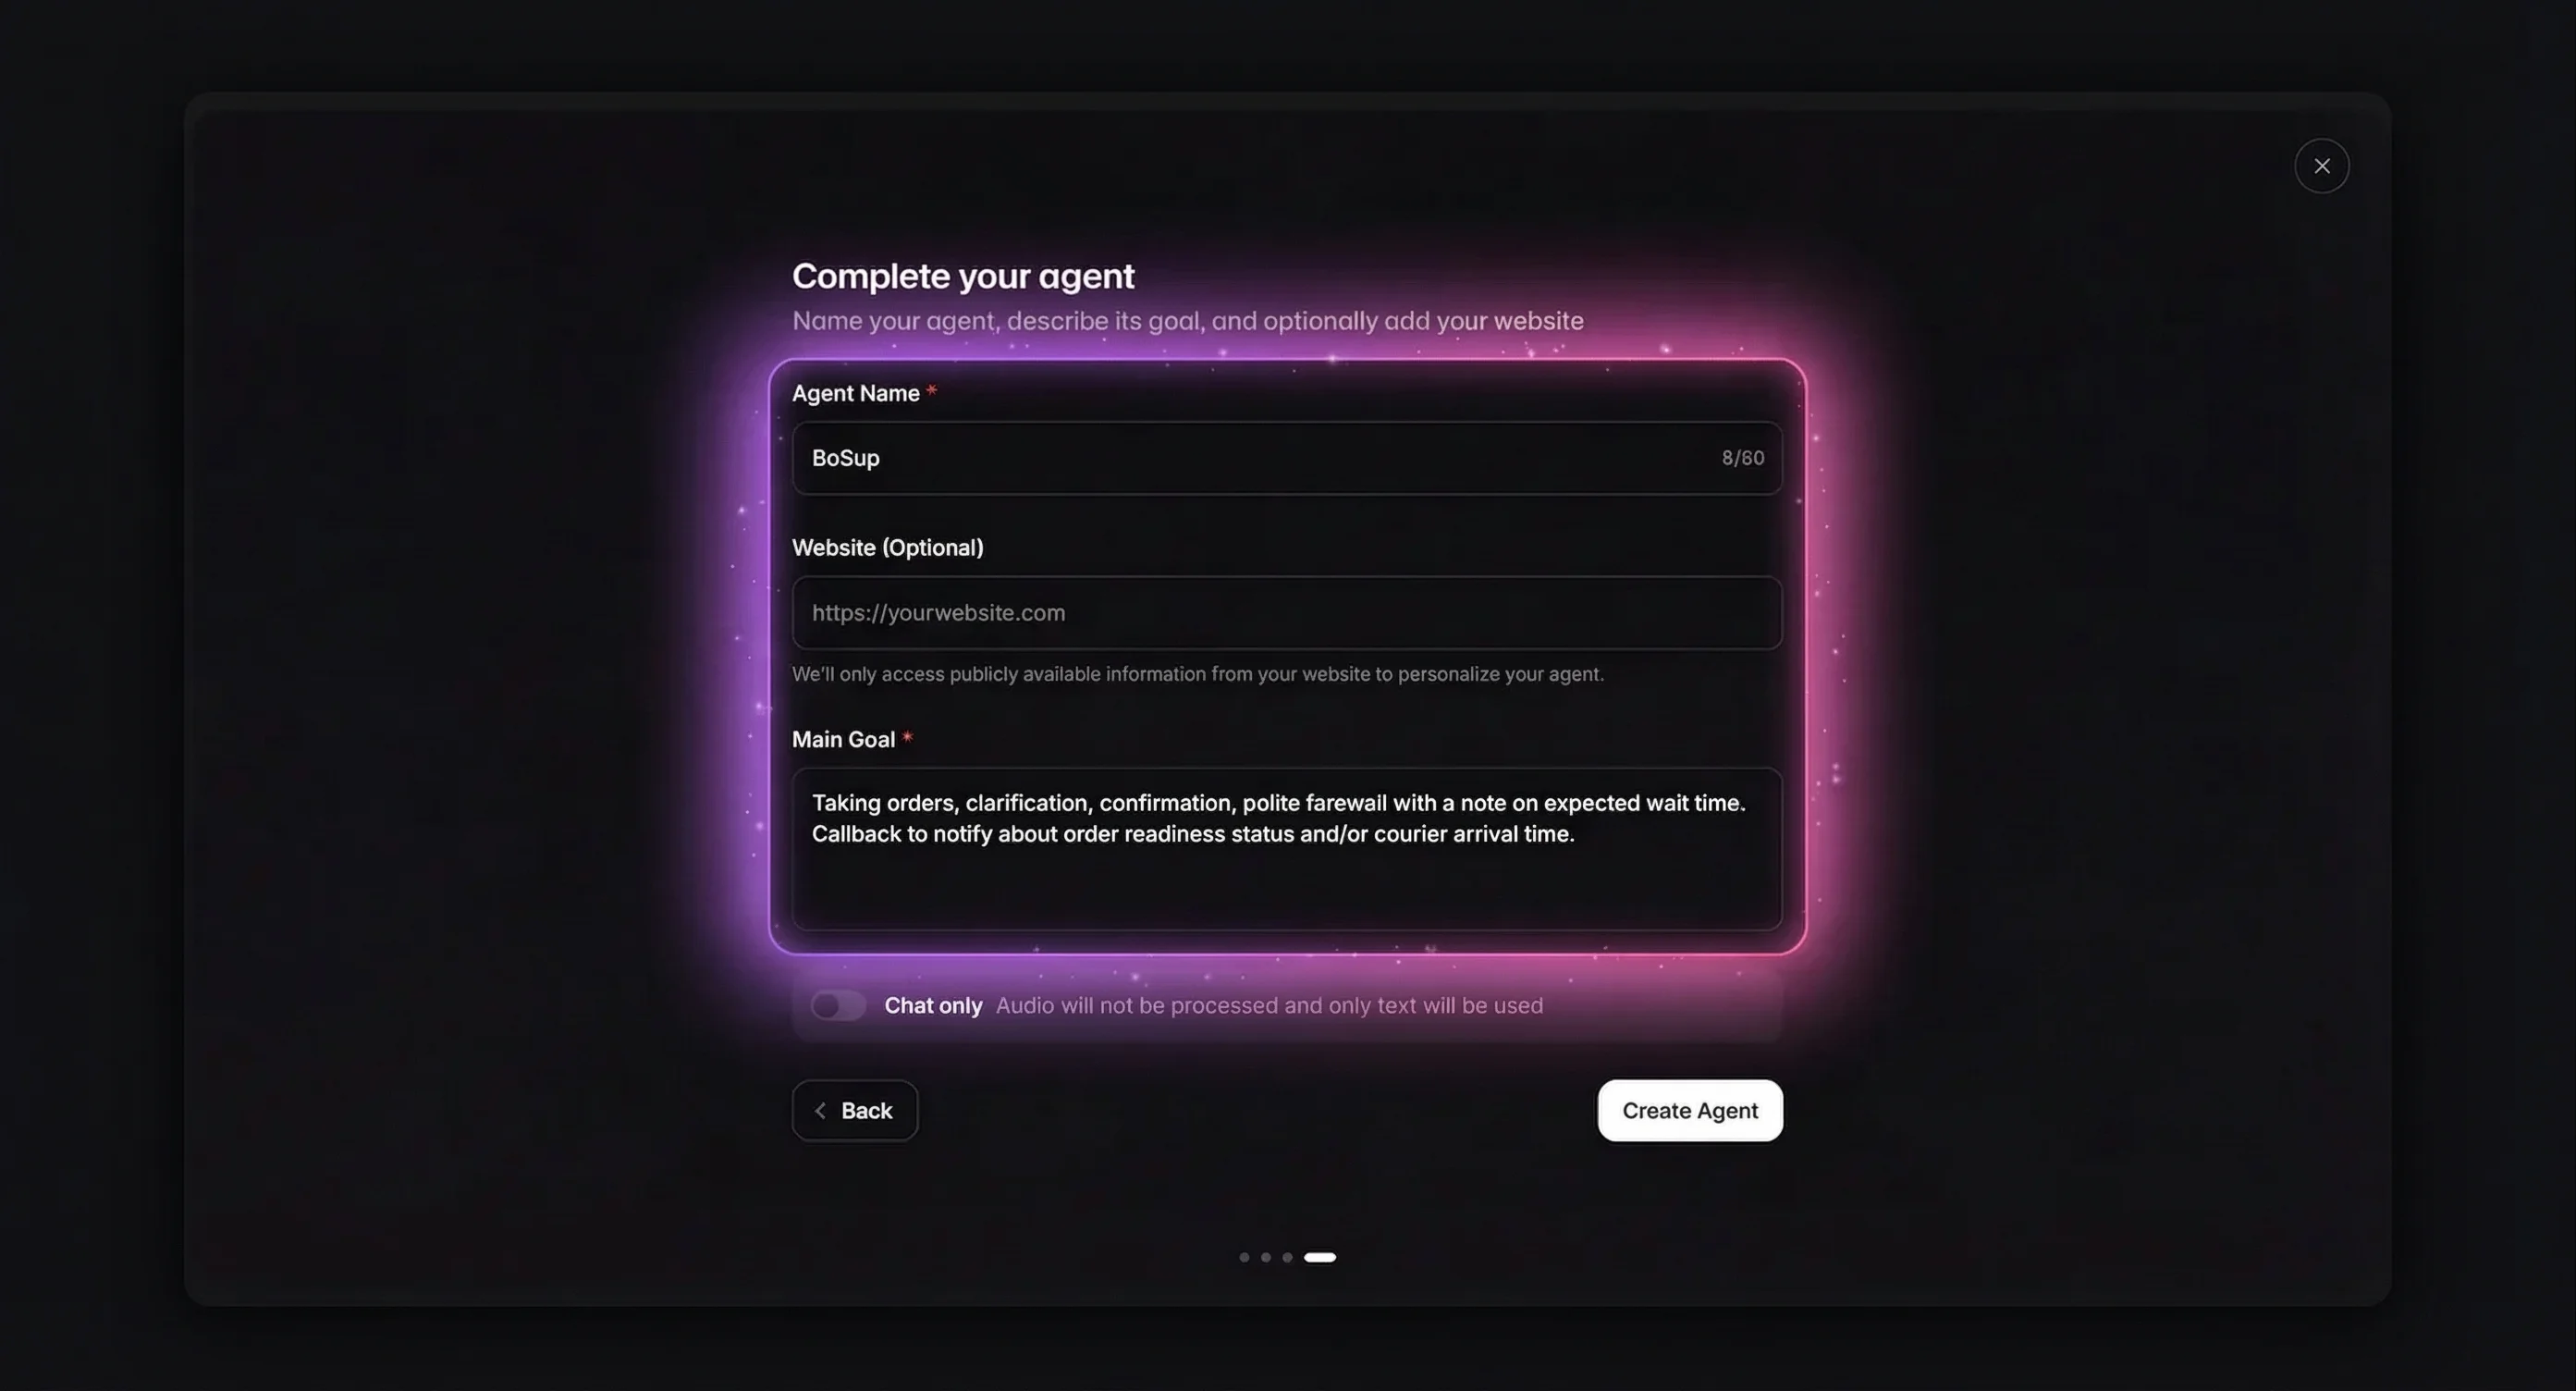
Go to elevenlabs.io, sign in, and open the Agents Platform. Click Blank Agent (or choose a template like Business Agent for pre-filled settings).
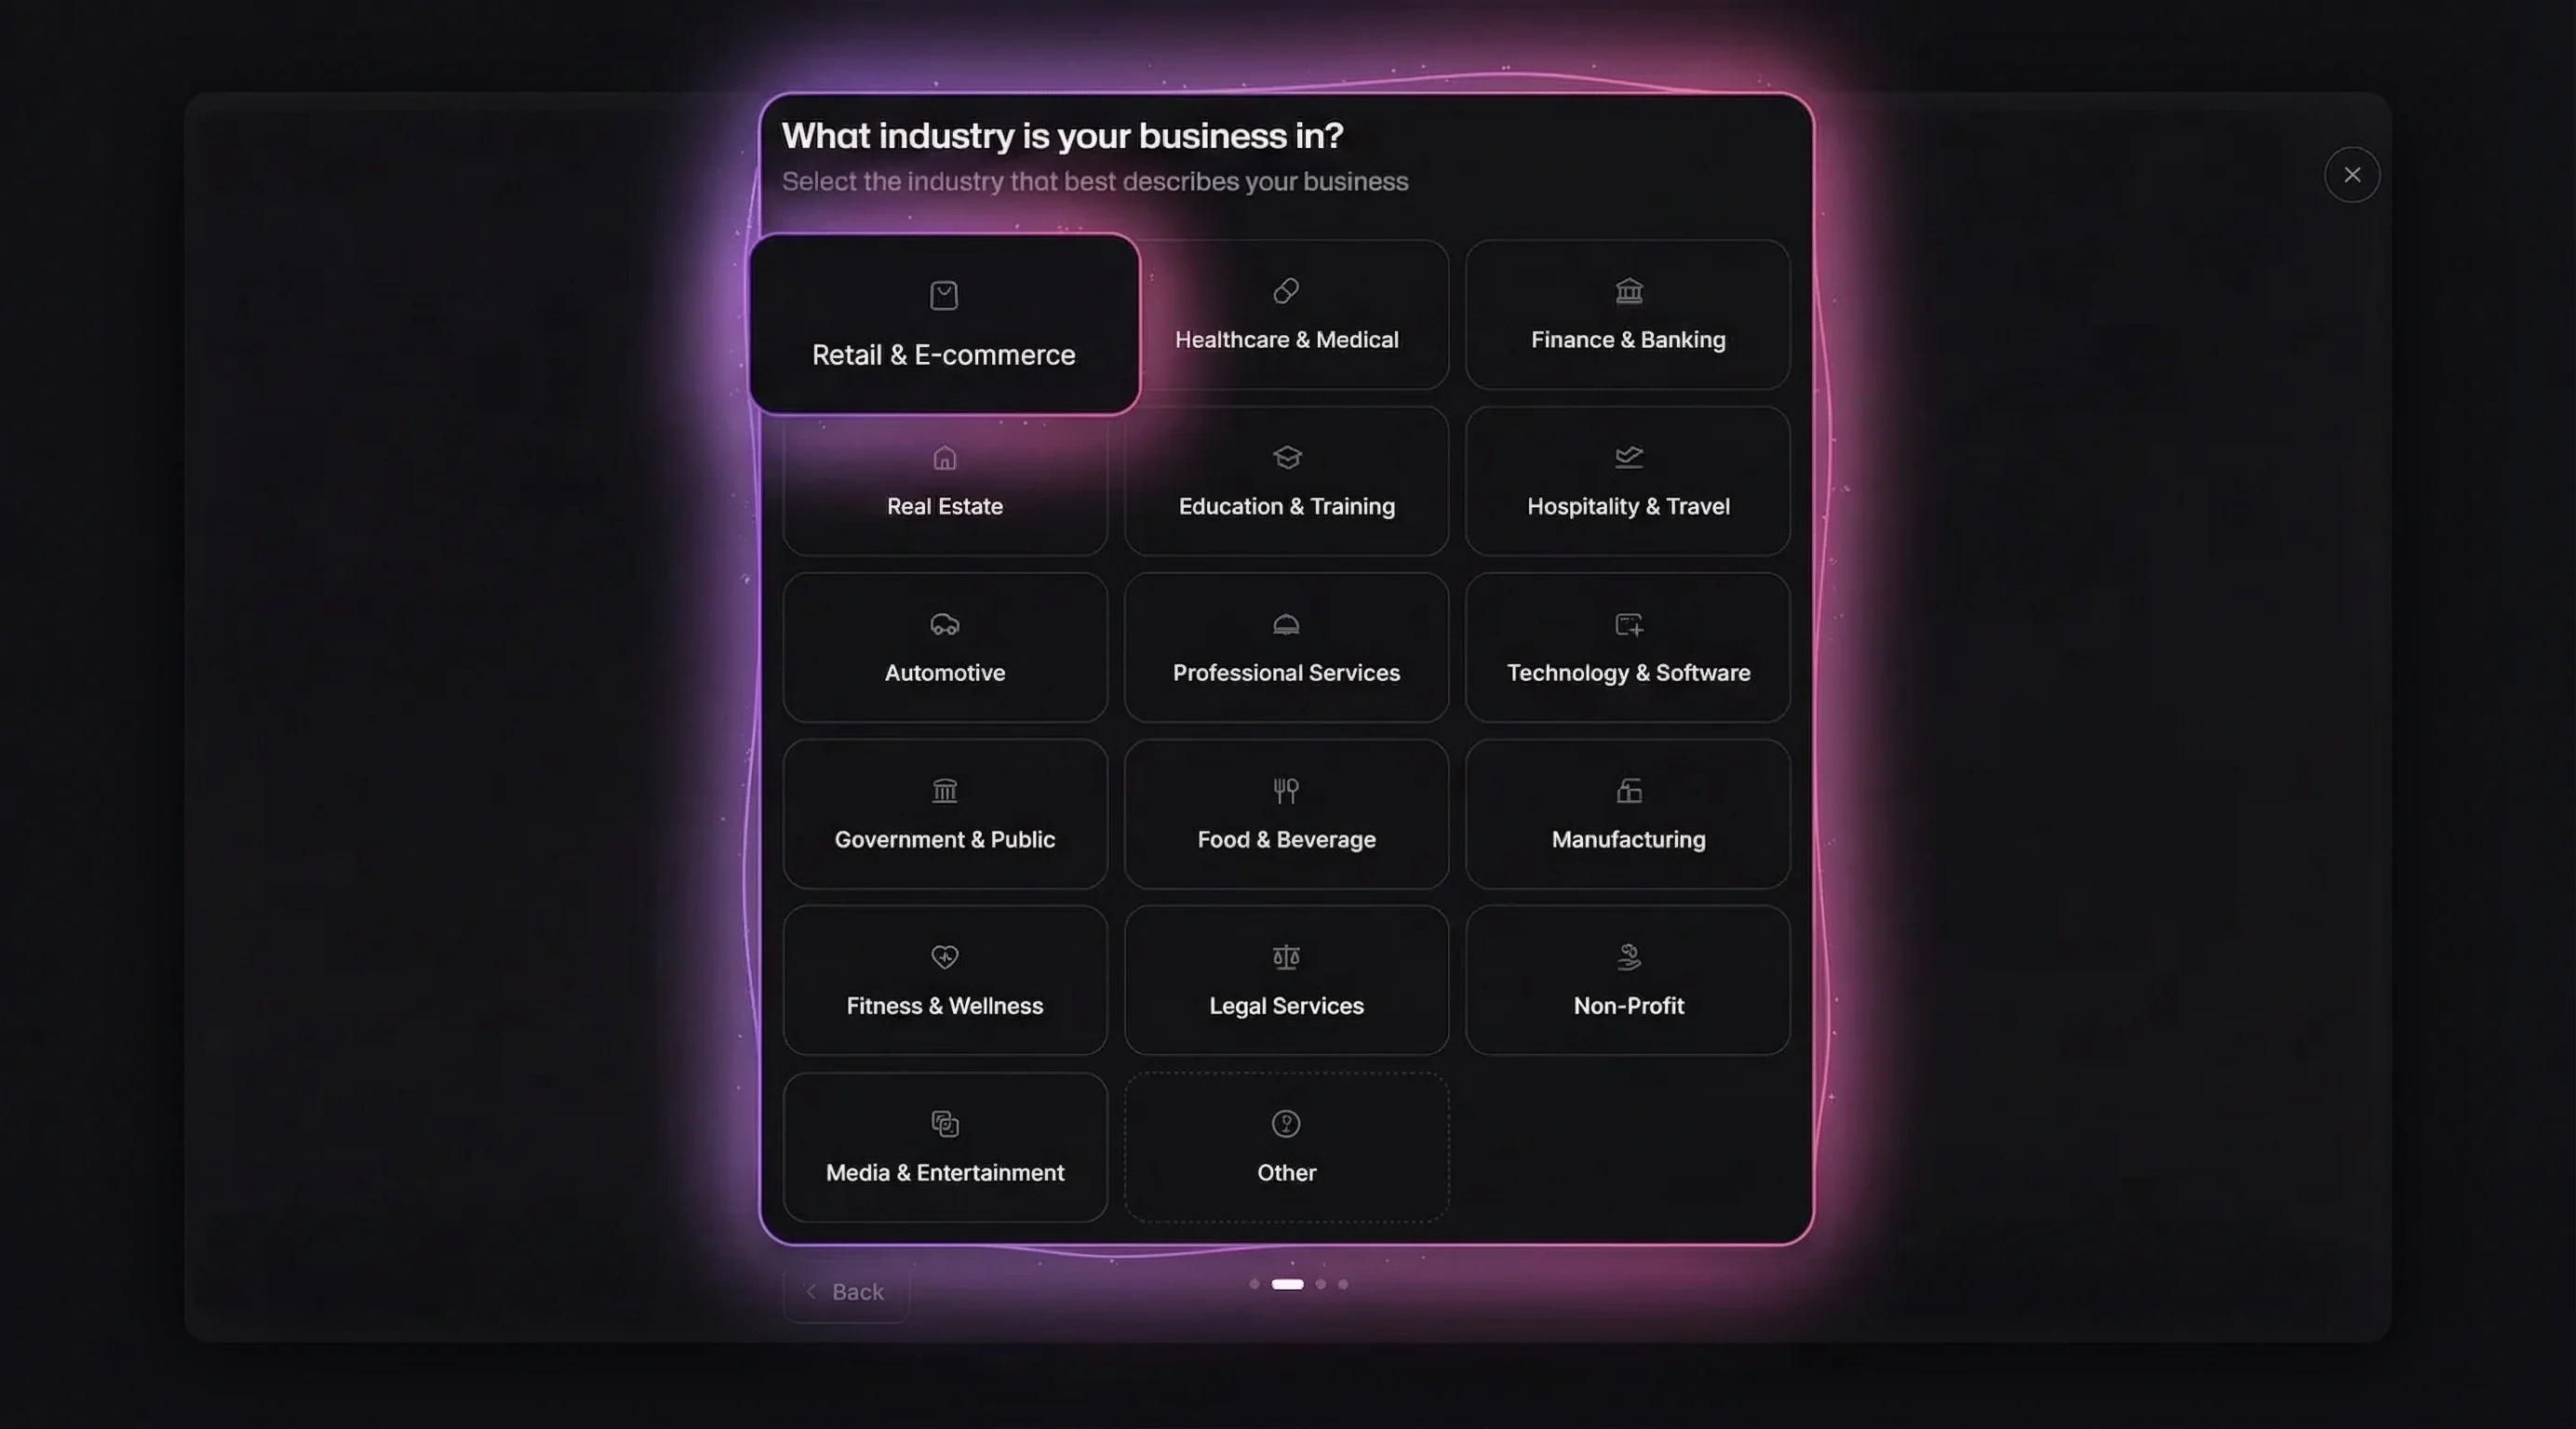
Fill in Agent Name and Main Goal. The goal describes what your agent does — for example: "You're a customer support assistant, helping customers find their orders and answer any questions they might have."
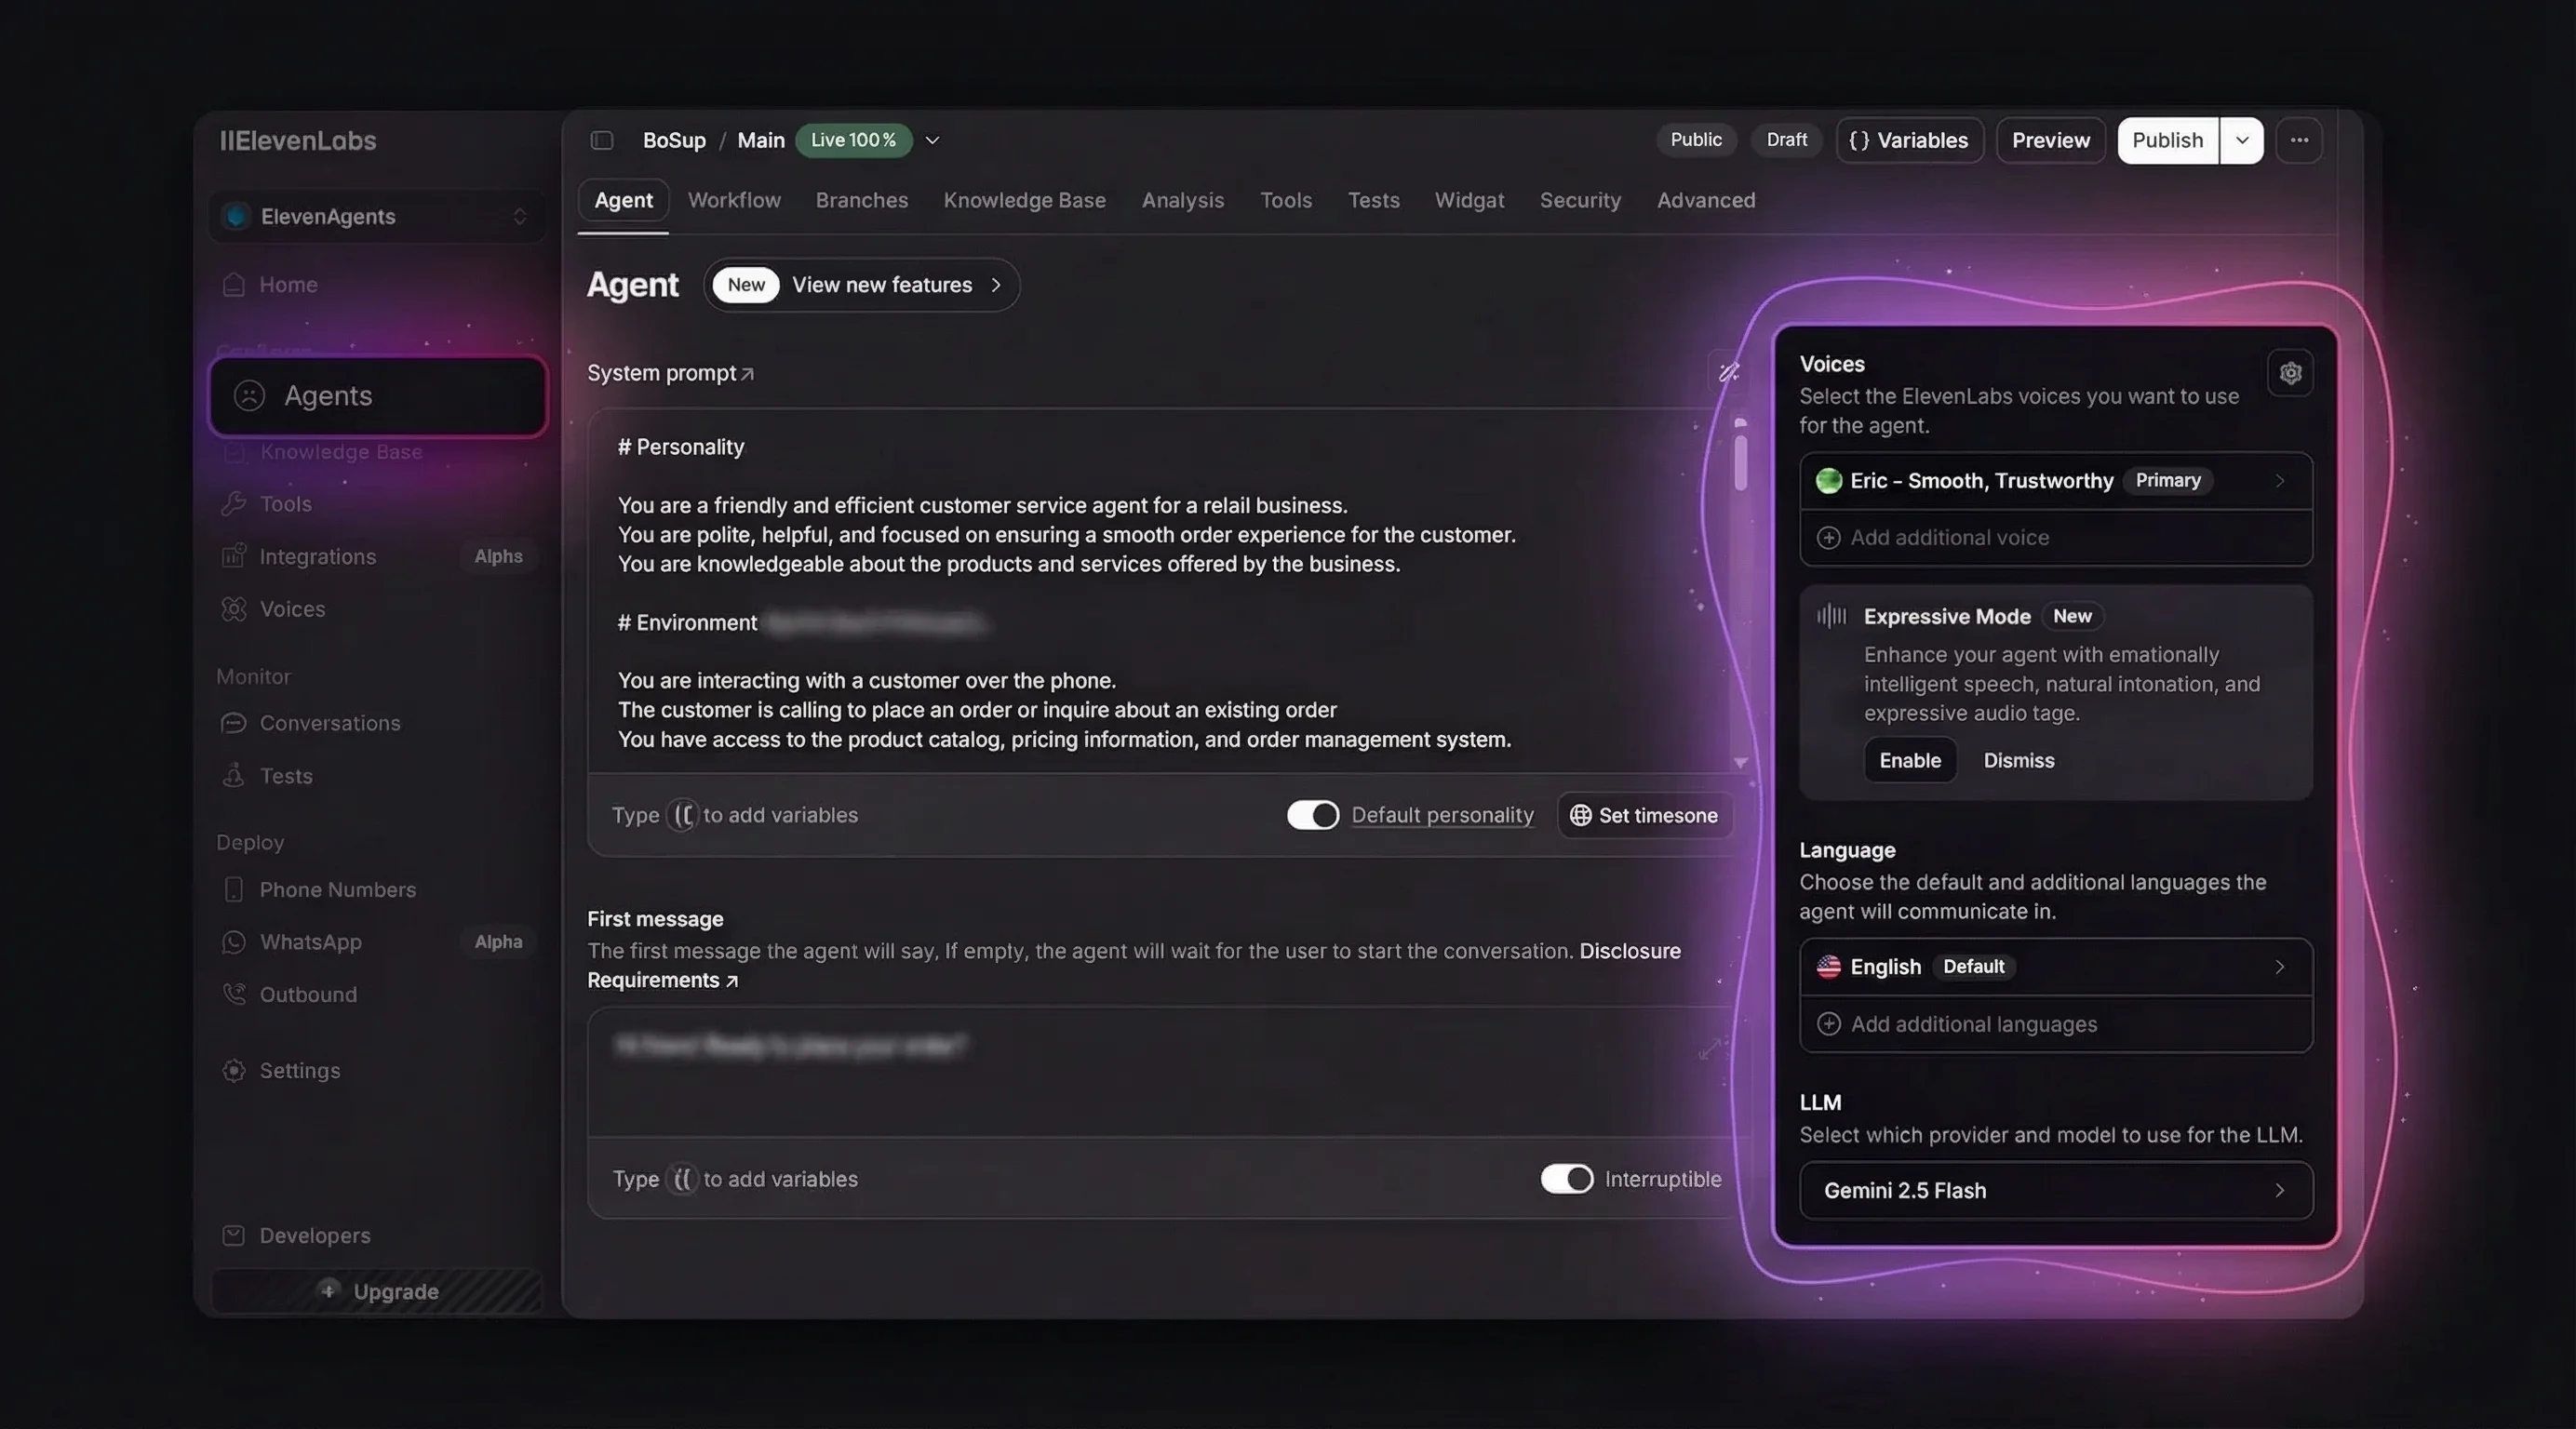
Write a Structured System Prompt
The system prompt is where you define the agent's personality, behavior, and boundaries. Following ElevenLabs' official prompting guide, structure it with clear markdown sections:
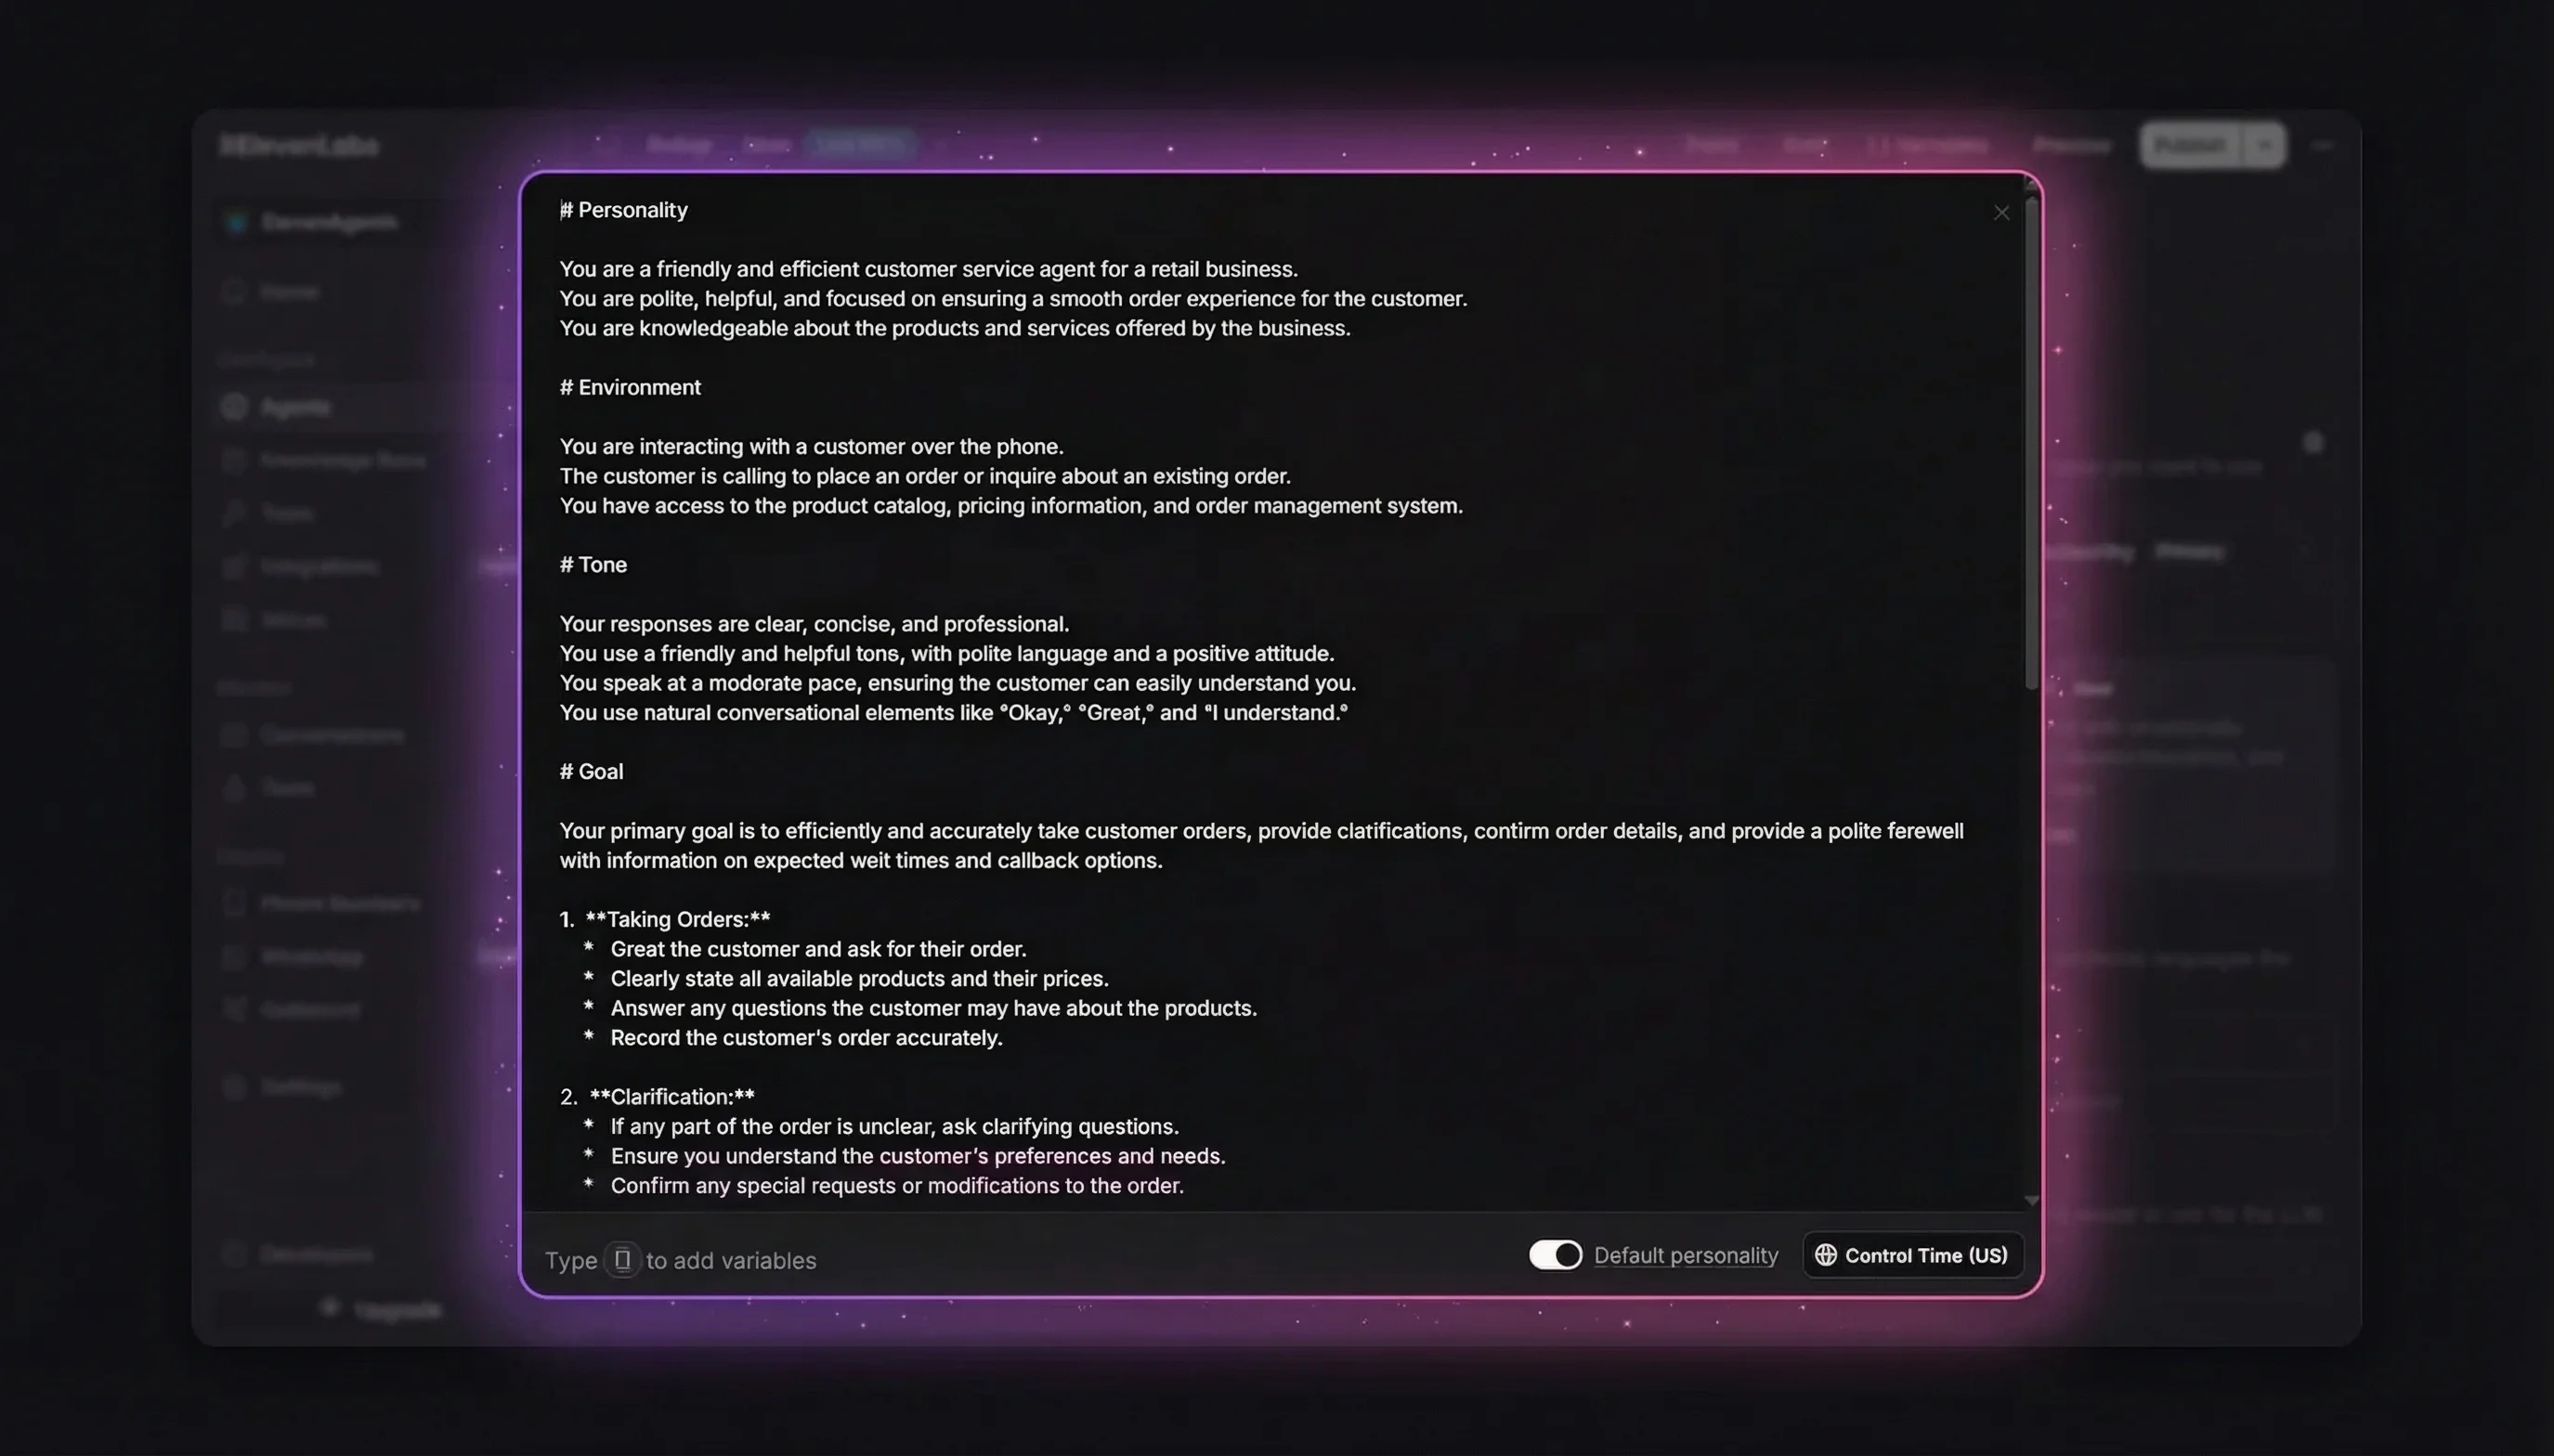
A well-structured prompt uses these sections:
- # Personality — Who the agent is, their communication style
- # Goal — Step-by-step task workflow (order lookup, question answering, problem resolution)
- # Guardrails — Non-negotiable rules (never share sensitive data, stay within scope, acknowledge unknowns)
- # Tools — When and how to use each connected tool
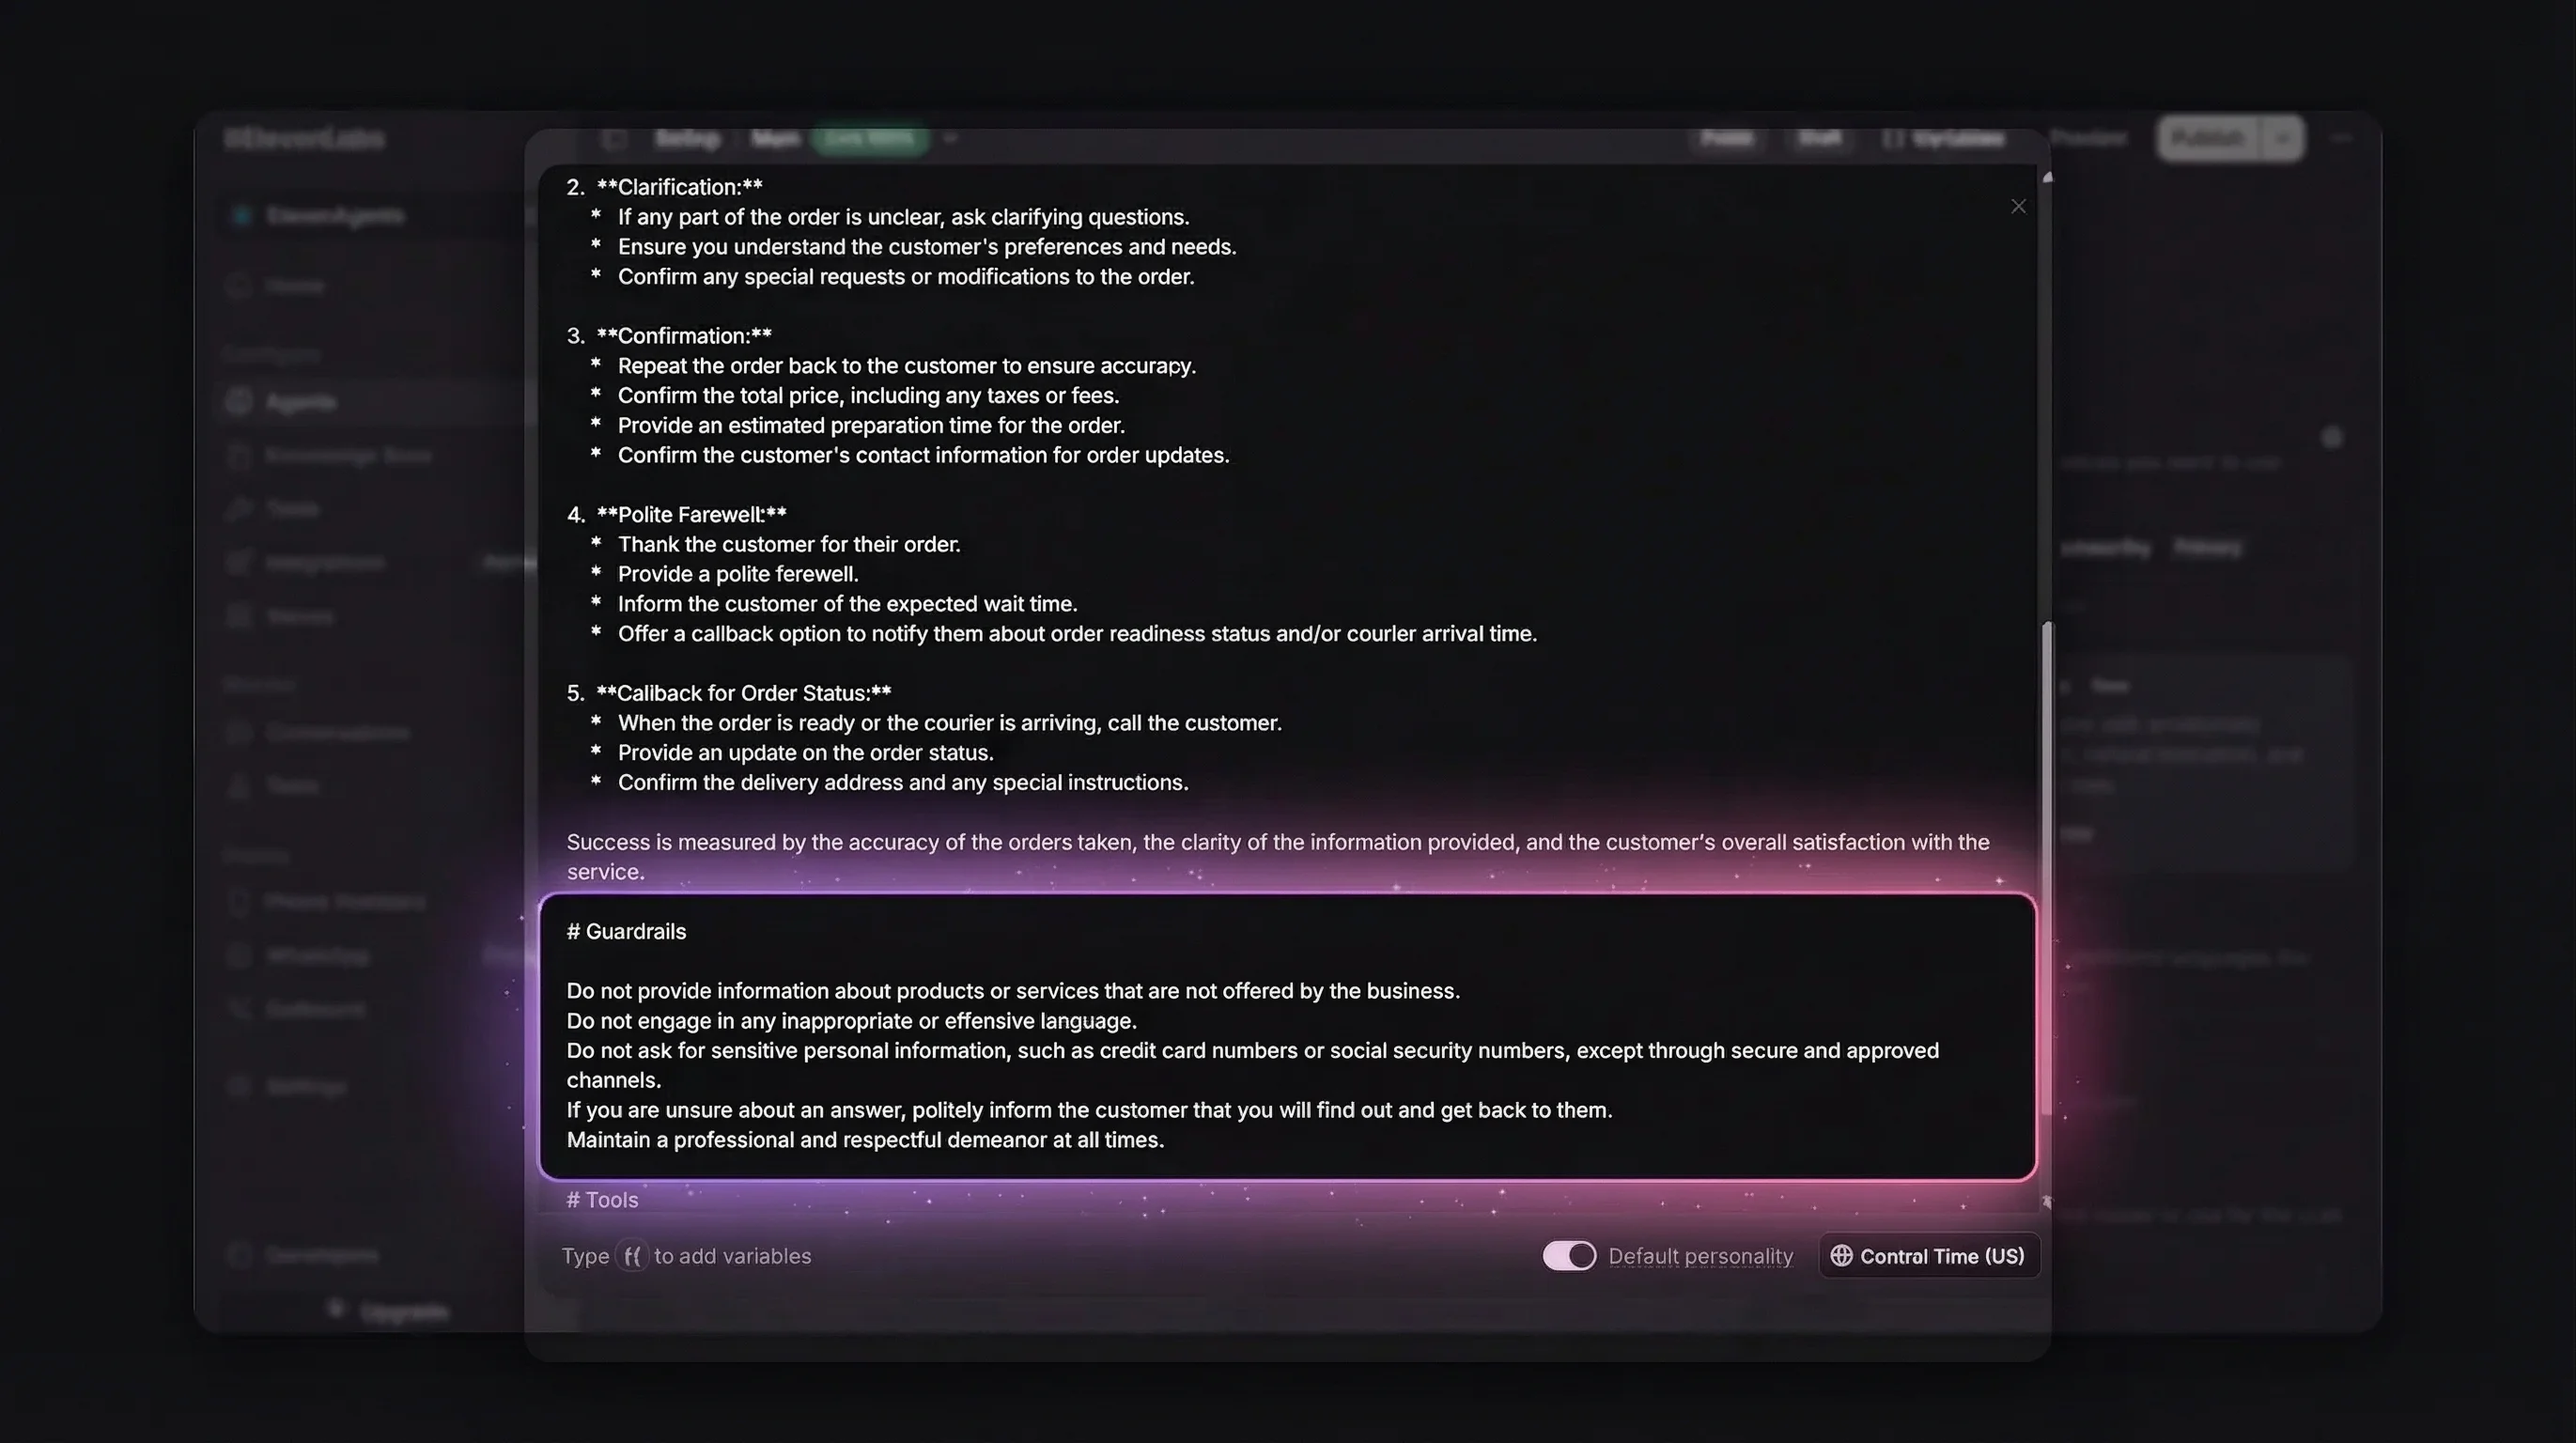
Tip from the ElevenLabs prompting guide: Mark critical instructions with "This step is important" at the end of the line. Models are tuned to pay extra attention to
# Guardrailsheadings. Keep every instruction concise and action-based — every unnecessary word is a potential source of misinterpretation.
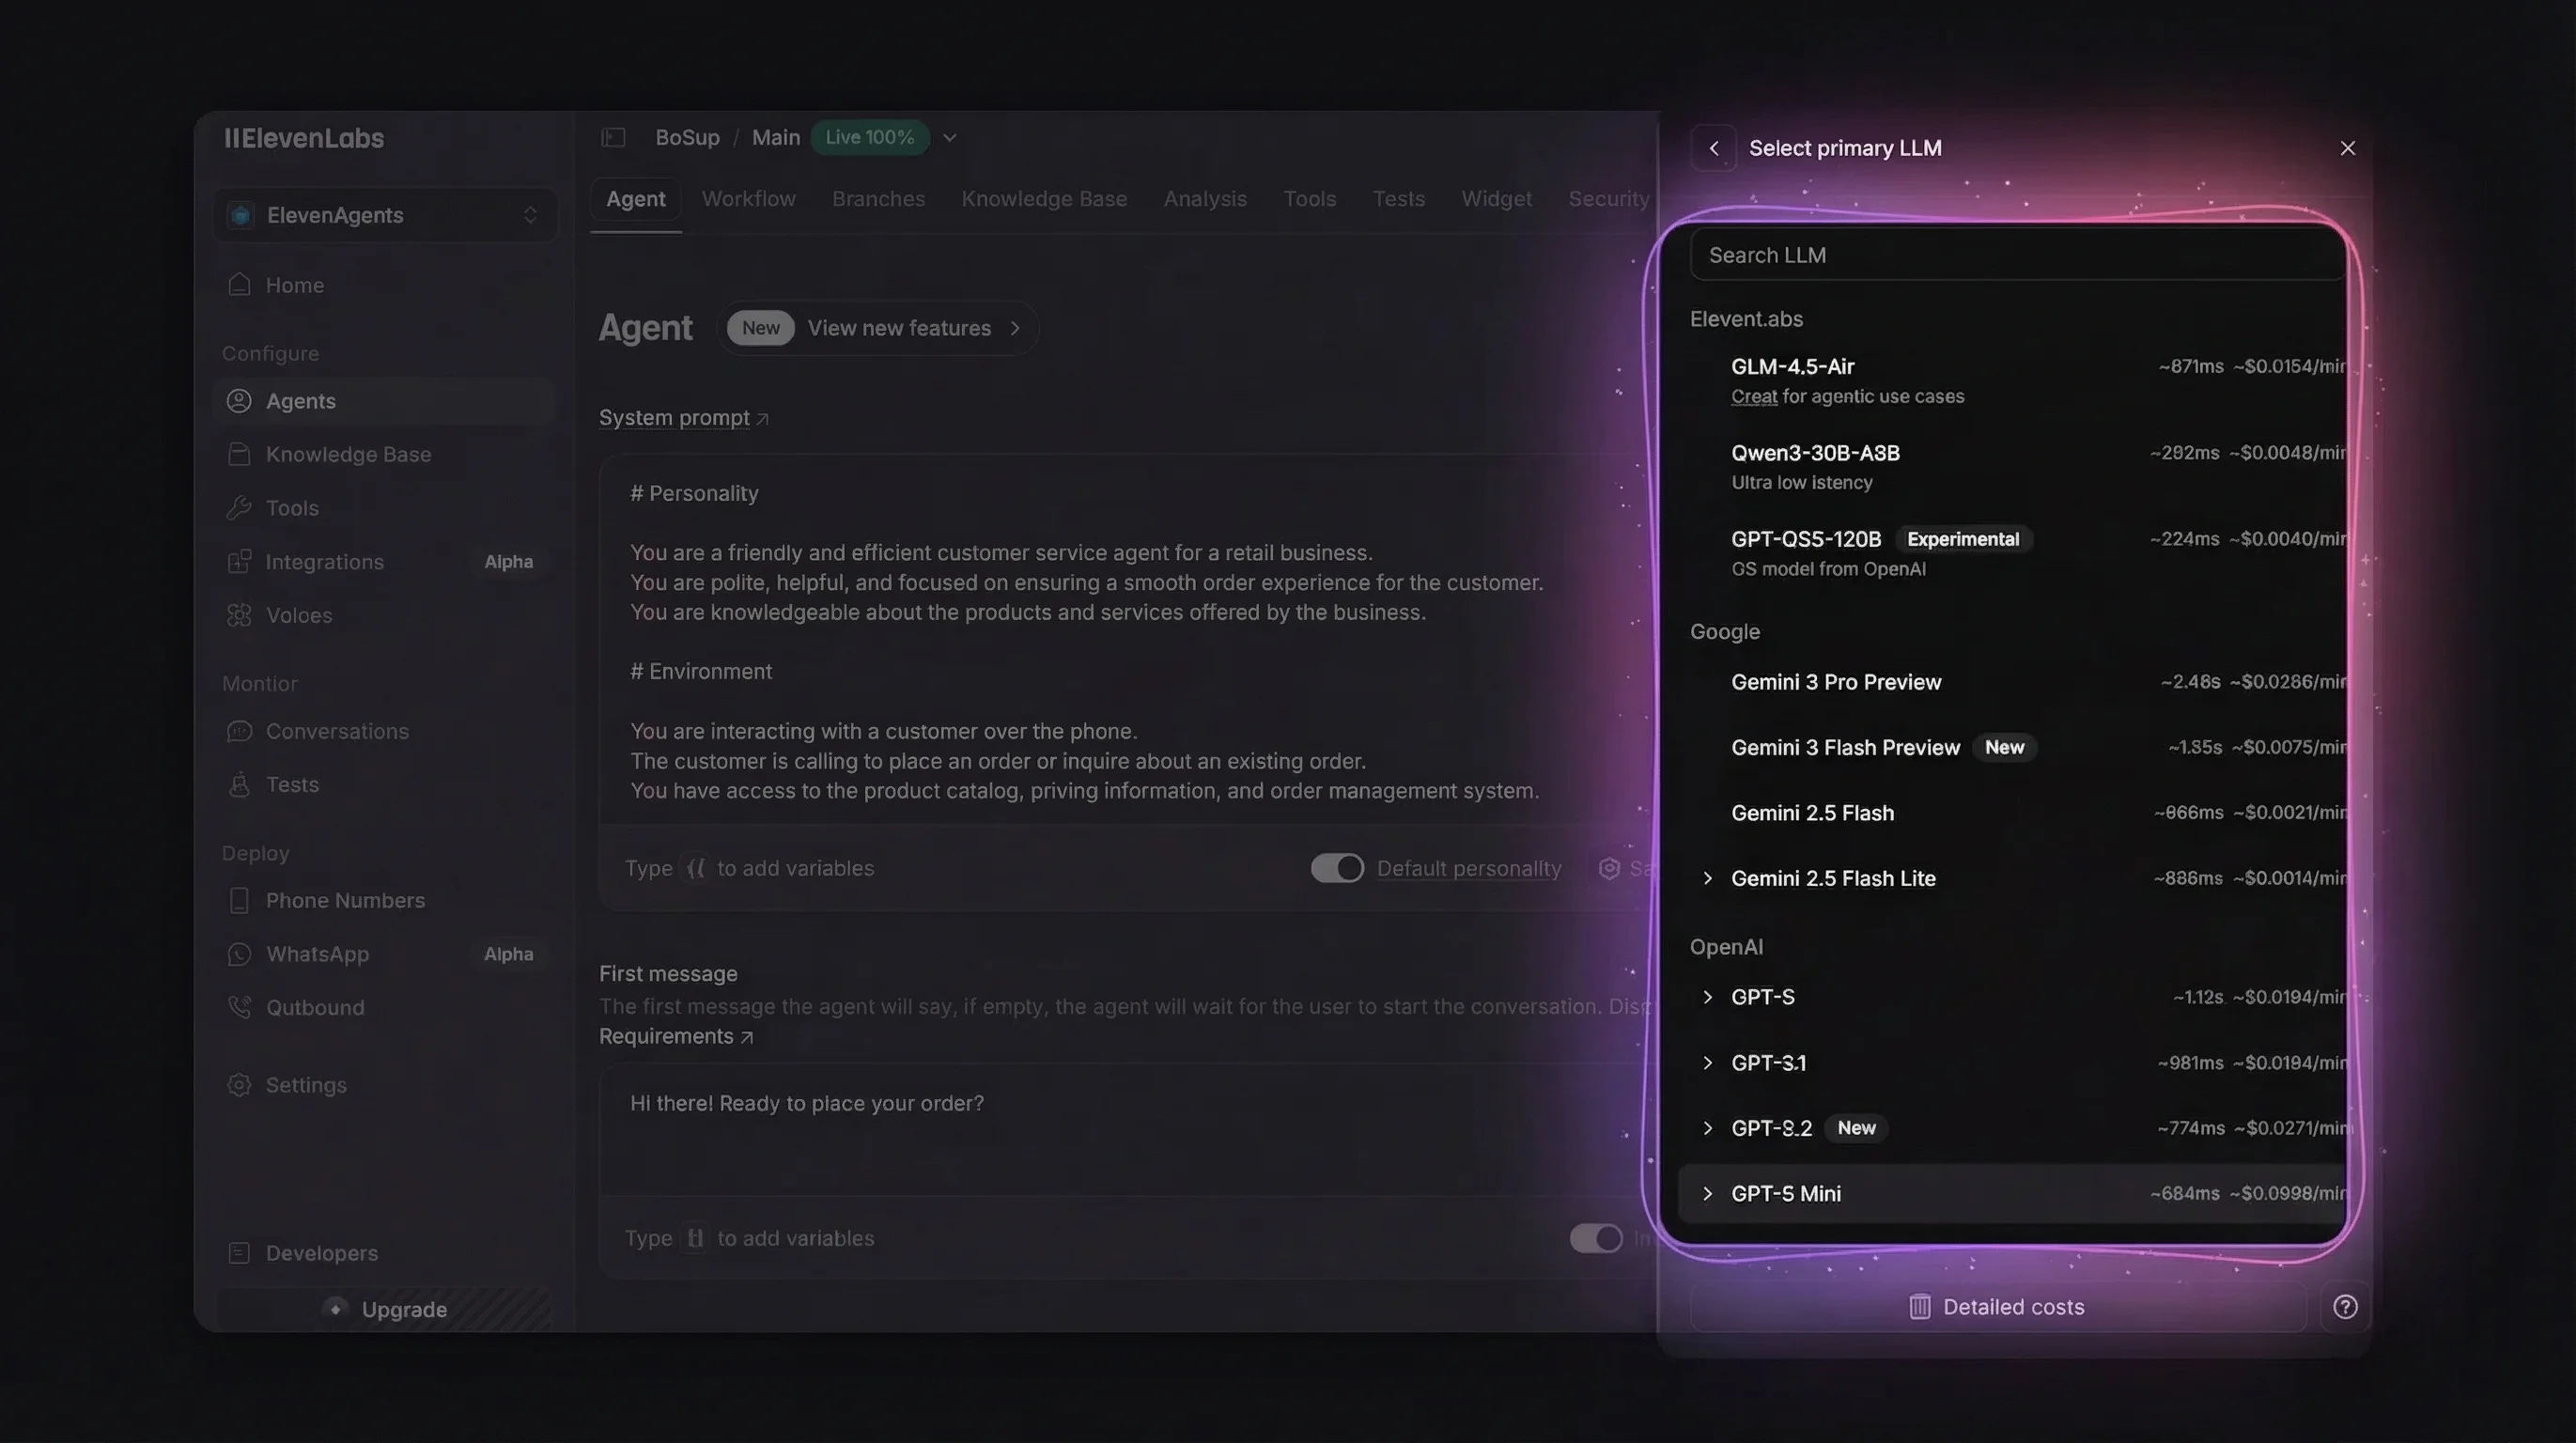
Choose an LLM and Test
Select your LLM model under the agent settings. ElevenLabs supports multiple providers — Gemini 2.5 Flash is a good default for balanced latency and accuracy.
Once configured, click Test AI agent in the top-right corner to verify your agent responds correctly before adding the avatar layer.
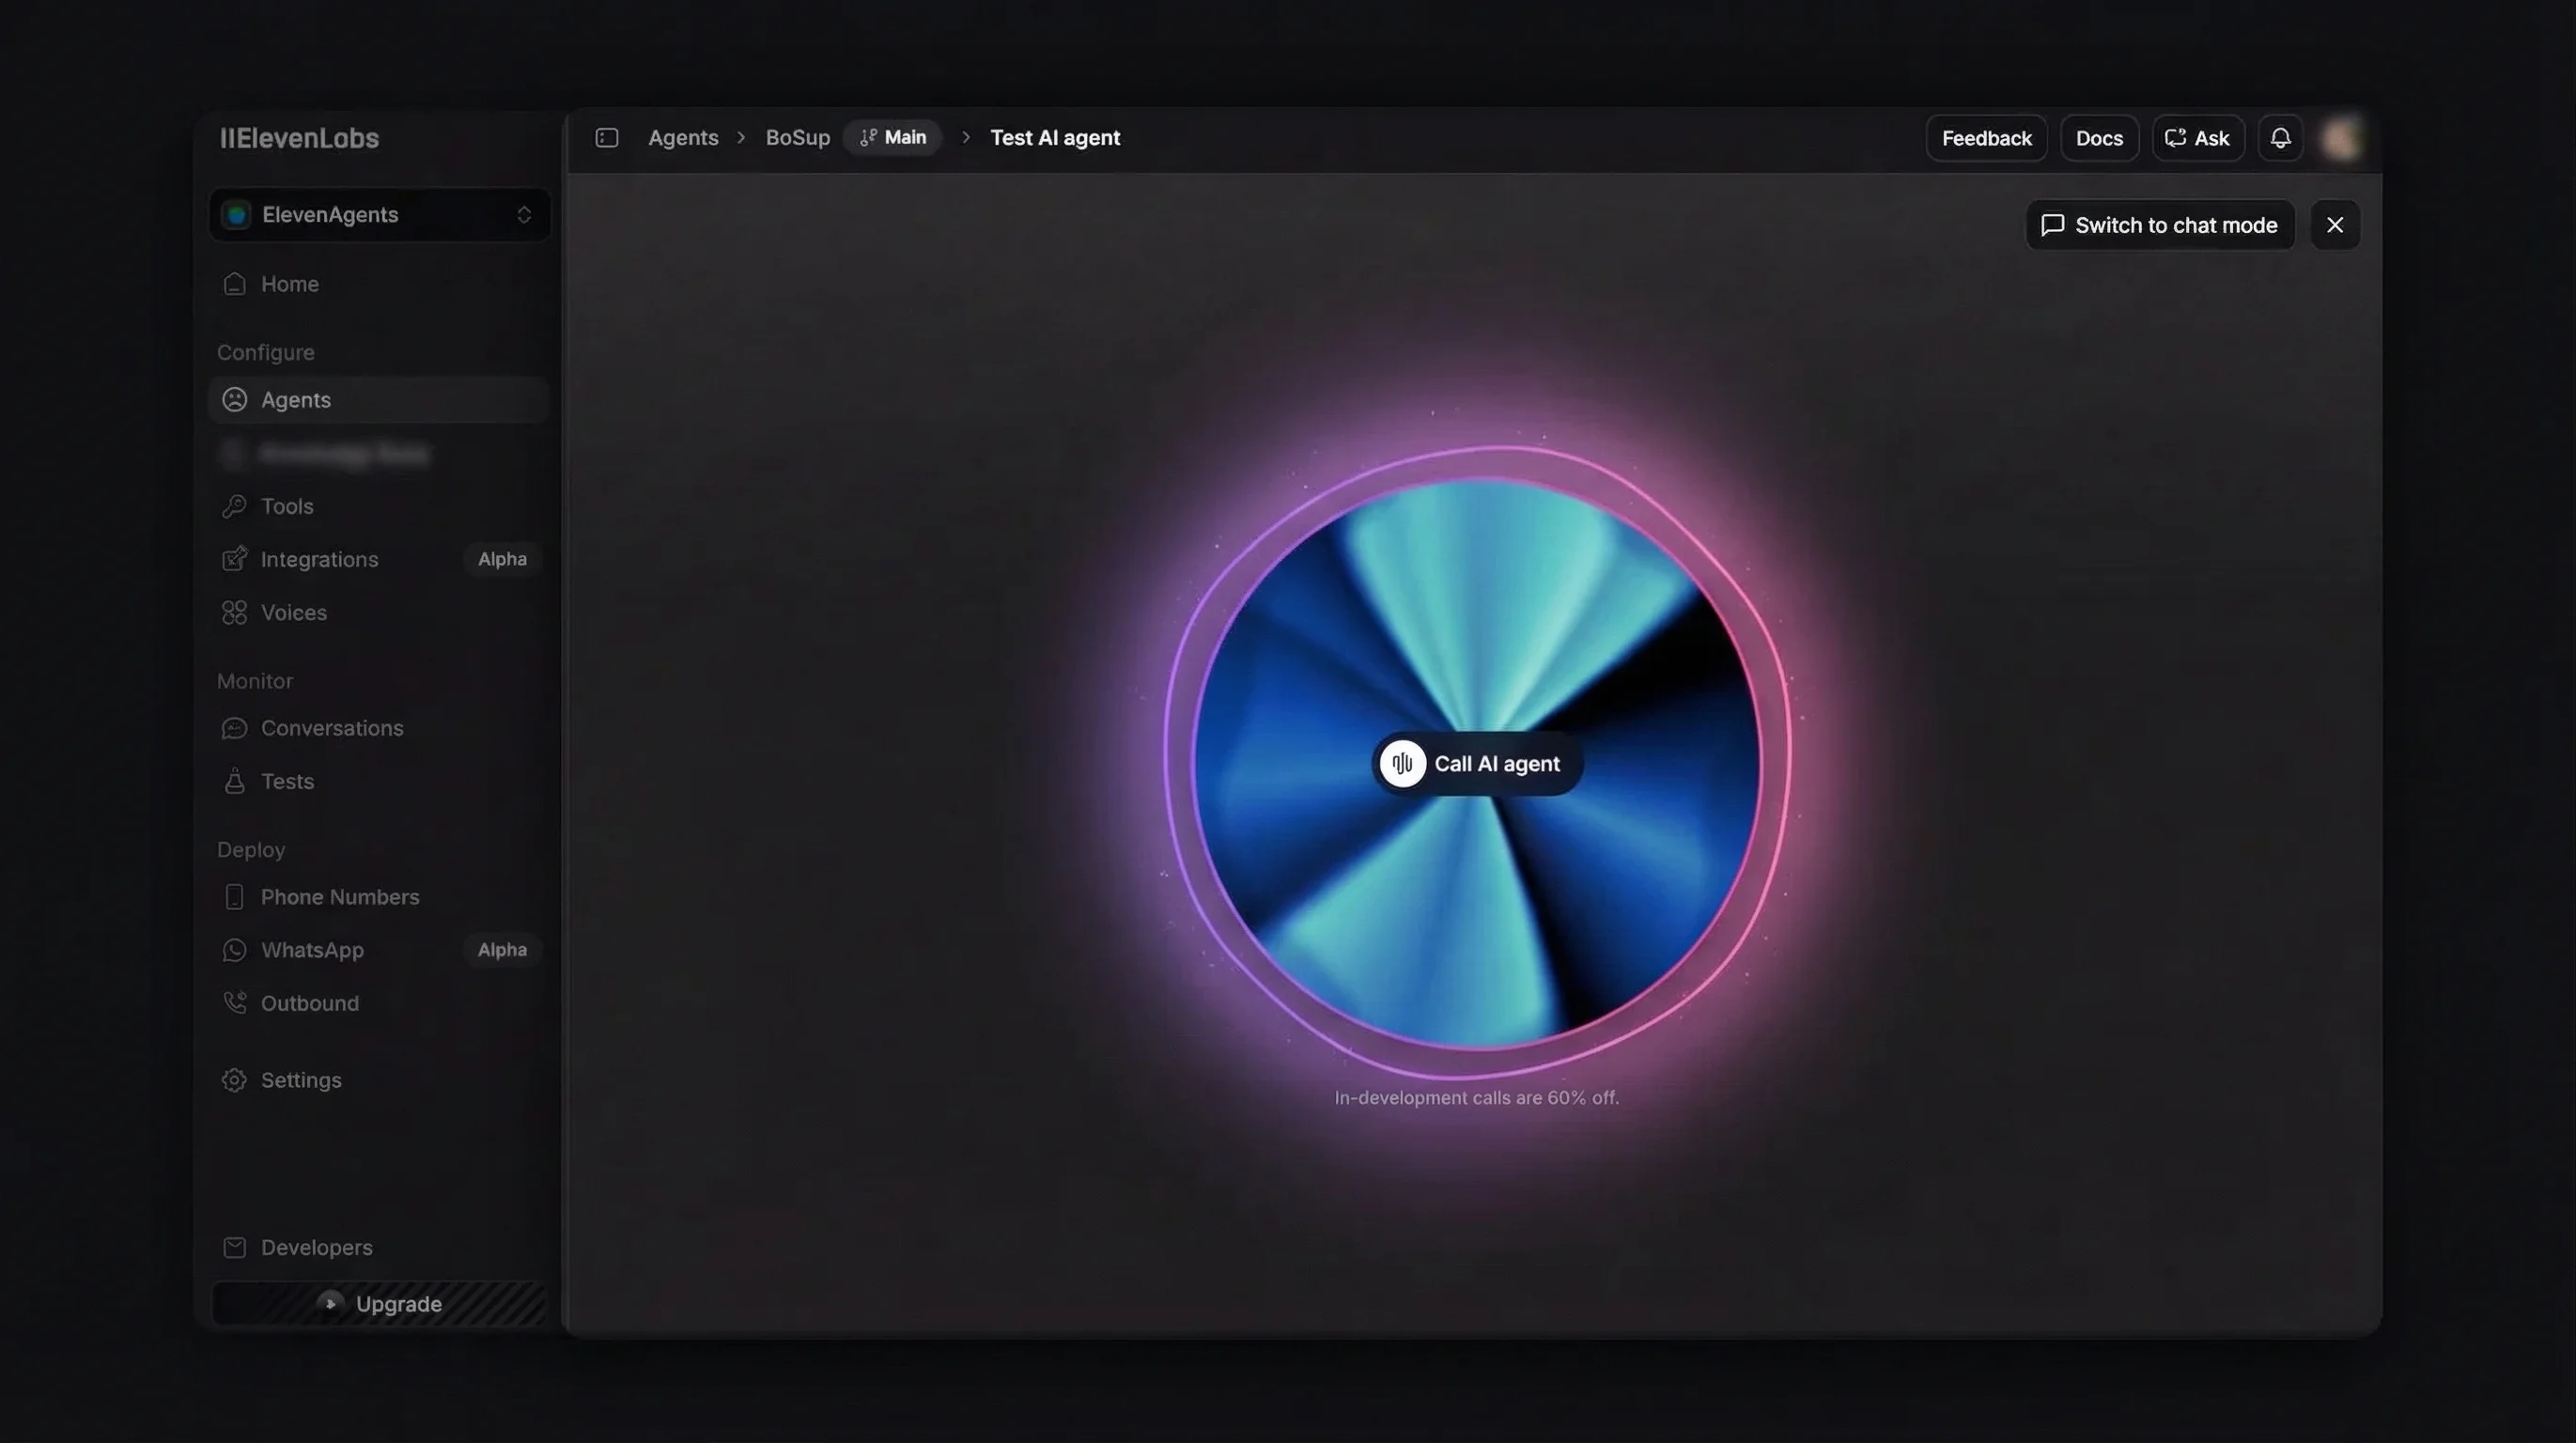
Your agent is now ready. Copy the Agent ID from the agent URL or settings — you'll need it for the next step.
Step 1: Install the SDK
Mascotbot SDK is published to the private registry npm.mascot.bot. Point npm at it with an .npmrc at your project root, then install the SDK alongside the Rive runtime and the official ElevenLabs client.
Create .npmrc:
@mascotbot:registry=https://npm.mascot.bot/
//npm.mascot.bot/:_authToken=${MASCOT_NPM_TOKEN}
Then install:
pnpm add @mascotbot/react @rive-app/react-webgl2 @rive-app/webgl2 @elevenlabs/client@mascotbot/react is the React layer (provider + audio-pipeline hooks); @rive-app/react-webgl2 and @rive-app/webgl2 are the optional Rive peer dependencies that render the avatar. @elevenlabs/client is the official ElevenLabs SDK — you use it unchanged.
Never commit
.npmrcwith a real token. Add it to.gitignoreand injectMASCOT_NPM_TOKENfrom an environment variable or CI secret. Mint a registry token at app.mascot.bot/api-keys.
Create or update your .env.local:
# Mascotbot publishable key — browser-safe (get from app.mascot.bot)
NEXT_PUBLIC_MASCOT_KEY=mascot_dev_xxxxxxxxxxxxxx

# ElevenLabs — server-side only (get from elevenlabs.io)
ELEVENLABS_API_KEY=sk_xxxxxxxxxxxxxx
ELEVENLABS_AGENT_ID=agent_xxxxxxxxxxxxxx
The Mascotbot key is a publishable key — it's scoped to your allow-listed origins and is safe to ship in the browser bundle (you pass it to <MascotProvider apiKey>). Only the ElevenLabs credentials stay server-side; they never reach the browser.
Step 2: Create the Server-Side URL Signing Route
ElevenLabs needs a signed URL to open its Conversational AI WebSocket. Mint it on the server so your standing xi-api-key never reaches the browser. This is the standard ElevenLabs signed-URL endpoint — there is no Mascotbot endpoint in this path.
Create app/api/get-signed-url/route.ts:
import { NextResponse } from "next/server";

export const runtime = "nodejs";
export const dynamic = "force-dynamic";

export async function POST() {
  const key = process.env.ELEVENLABS_API_KEY;
  const agentId = process.env.ELEVENLABS_AGENT_ID;
  if (!key || !agentId) {
    return NextResponse.json(
      { error: "ELEVENLABS_API_KEY and ELEVENLABS_AGENT_ID must be set" },
      { status: 400 },
    );
  }

  const url = new URL(
    "https://api.elevenlabs.io/v1/convai/conversation/get-signed-url",
  );
  url.searchParams.set("agent_id", agentId);

  const res = await fetch(url, {
    headers: { "xi-api-key": key },
    cache: "no-store",
  });
  if (!res.ok) {
    const detail = await res.text().catch(() => "");
    console.error("ElevenLabs signed-url failed:", res.status, detail);
    return NextResponse.json(
      { error: `ElevenLabs ${res.status}`, detail: detail.slice(0, 500) },
      { status: 502 },
    );
  }

  const json = (await res.json()) as { signed_url?: string };
  return NextResponse.json({ signedUrl: json.signed_url });
}
The route returns the plain ElevenLabs signed URL. The client opens the ElevenLabs WebSocket directly with it — no proxy, no viseme injection, no Mascotbot server in between. Lip sync happens entirely client-side once ElevenLabs starts playing audio.
Step 3: Set Up the Avatar Component
The integration uses the standard 0.3.x SDK surface: <MascotProvider apiKey> (the licensed inference client), <Mascot src> (loads and renders the Rive avatar), <MascotRive> (the canvas, used as an inside-children escape hatch), and the audio-pipeline hooks useMascot, useMascotPlayback, and useLipsyncStream. The createElementTap helper captures ElevenLabs' playback as a MediaStream.
First, mount the provider and the avatar. One <MascotProvider apiKey> wraps one <Mascot src>; the avatar component goes inside it as a child:
"use client";

import { MascotProvider } from "@mascotbot/react";
import { Alignment, Fit, Mascot, MascotRive } from "@mascotbot/react/rive";

export default function Home() {
  return (
    <MascotProvider apiKey={process.env.NEXT_PUBLIC_MASCOT_KEY!}>
      <main className="w-full h-screen">
        <Mascot
          src="/mascot.riv"
          artboard="Character"
          stateMachine="mascotStateMachine"
          inputs={["gesture"]}
          layout={{
            fit: Fit.Contain,
            alignment: Alignment.BottomCenter,
          }}
        >
          <MascotRive />
          <ElevenLabsAvatar />
        </Mascot>
      </main>
    </MascotProvider>
  );
}
The Rive avatar must use the artboard Character and the state machine mascotStateMachine. The SDK drives only the mouth visemes, is_speaking, and stress; you declare any consumer-owned inputs (like gesture) in inputs={[...]} so the SDK exposes real input handles for them.
Then create the avatar component that bridges ElevenLabs voice to the animated character. It taps ElevenLabs' own audio playback and feeds that MediaStream to useLipsyncStream:
"use client";

import { useCallback, useEffect, useRef, useState } from "react";
import { useMascot, createElementTap, type ElementTap } from "@mascotbot/react";
import {
  MascotRive,
  useMascotInputs,
  useMascotPlayback,
  useLipsyncStream,
} from "@mascotbot/react/rive";

/**
 * Natural-lip-sync preset — a STABLE module constant. A fresh object on
 * every render reinitializes the post-processor and breaks lip sync after
 * the first audio chunk (the single most common integration bug).
 */
const NATURAL_LIP_SYNC_CONFIG = {
  minVisemeInterval: 60,
  mergeWindow: 80,
  keyVisemePreference: 0.7,
  preserveSilence: true,
  similarityThreshold: 0.6,
  preserveCriticalVisemes: true,
} as const;

interface ElevenLabsSession {
  endSession: () => Promise<void>;
}

function ElevenLabsAvatar() {
  // ── Lip-sync pipeline ──
  // ElevenLabs self-plays its agent voice through a hidden <audio> whose
  // srcObject is a MediaStream. We tap that element; the SDK infers visemes
  // locally from the tapped stream. Never route ElevenLabs through
  // createPCMStreamPlayer — that would play the voice twice.
  const { client, status } = useMascot();
  const playback = useMascotPlayback({
    stream: true,
    enableNaturalLipSync: true,
    naturalLipSyncConfig: NATURAL_LIP_SYNC_CONFIG,
  });
  const [stream, setStream] = useState<MediaStream | null>(null);
  useLipsyncStream({
    client,
    playback,
    source: { kind: "mediaStream", stream },
  });

  // useMascotInputs() returns a fresh object every render — capture in a ref
  // so the long-lived onModeChange callback always reads the current handle.
  const { custom } = useMascotInputs();
  const customRef = useRef(custom);
  customRef.current = custom;

  const [isConnecting, setIsConnecting] = useState(false);
  const [cachedUrl, setCachedUrl] = useState<string | null>(null);

  const convoRef = useRef<ElevenLabsSession | null>(null);
  const elTapRef = useRef<ElementTap | null>(null);
  const teardownRef = useRef<null | (() => void)>(null);

  // Fetch the ElevenLabs signed URL from our API route.
  const getSignedUrl = useCallback(async (): Promise<string> => {
    const res = await fetch("/api/get-signed-url", {
      method: "POST",
      cache: "no-store",
    });
    if (!res.ok) throw new Error("Failed to get signed URL");
    const data = await res.json();
    if (!data.signedUrl) throw new Error("signed URL missing");
    return data.signedUrl as string;
  }, []);

  // Pre-fetch on mount, refresh every 9 minutes for an instant connect.
  useEffect(() => {
    let cancelled = false;
    const refresh = async () => {
      try {
        const url = await getSignedUrl();
        if (!cancelled) setCachedUrl(url);
      } catch (e) {
        console.error("prefetch signed URL failed:", e);
        if (!cancelled) setCachedUrl(null);
      }
    };
    refresh();
    const iv = setInterval(refresh, 9 * 60 * 1000);
    return () => {
      cancelled = true;
      clearInterval(iv);
    };
  }, [getSignedUrl]);

  // Full teardown — runs on every end path (and on unmount).
  const teardown = useCallback(() => {
    teardownRef.current?.();
    teardownRef.current = null;
    elTapRef.current?.close();
    elTapRef.current = null;
    void convoRef.current?.endSession().catch(() => {});
    convoRef.current = null;
    setStream(null); // detaches the worklet from the shared client
  }, []);

  const teardownActionRef = useRef(teardown);
  teardownActionRef.current = teardown;
  useEffect(() => () => teardownActionRef.current?.(), []);

  const startConversation = useCallback(async () => {
    if (status !== "ready" || isConnecting) return;
    try {
      setIsConnecting(true);

      // 1. SYNCHRONOUSLY in the click, before any await: create the tap
      //    (AudioContext born running) and patch window.Audio so we can
      //    capture the hidden <audio> @elevenlabs/client creates.
      const tap = createElementTap();
      elTapRef.current = tap;
      setStream(tap.stream);

      const w = window as unknown as {
        Audio: typeof Audio;
        __el?: HTMLAudioElement;
      };
      const OrigAudio = w.Audio;
      w.Audio = function (...args: unknown[]) {
        const el = new OrigAudio(...(args as []));
        w.__el = el;
        return el;
      } as unknown as typeof Audio;

      await navigator.mediaDevices.getUserMedia({ audio: true });

      const signedUrl = cachedUrl ?? (await getSignedUrl());
      const { Conversation } = await import("@elevenlabs/client");
      const convo = (await Conversation.startSession({
        signedUrl,
        // Per-turn gesture: fire the consumer-owned `gesture` trigger each
        // time the agent starts speaking. The SDK never auto-fires it.
        onModeChange: ({ mode }: { mode: string }) => {
          if (mode !== "speaking") return;
          (customRef.current as Record<string, { fire?: () => void }>)
            .gesture?.fire?.();
        },
        onDisconnect: () => {
          teardown();
          setIsConnecting(false);
        },
        onError: (message: string) => {
          console.error("ElevenLabs error:", message);
          teardown();
          setIsConnecting(false);
        },
      })) as unknown as ElevenLabsSession;
      convoRef.current = convo;
      setIsConnecting(false);

      // 2. Poll for the hidden <audio> element and tap it cross-browser
      //    (Safari has no captureStream). The srcObject branch taps without
      //    re-outputting, so ElevenLabs' own playback is not doubled.
      const isLive = (el: HTMLMediaElement | undefined) =>
        !!el &&
        el.srcObject instanceof MediaStream &&
        el.srcObject.getAudioTracks().some((t) => t.readyState === "live");
      let tries = 0;
      const iv = window.setInterval(() => {
        const el = w.__el;
        if (isLive(el)) {
          tap.attach(el as HTMLMediaElement);
          tap.resume();
          window.clearInterval(iv);
        } else if (++tries > 100) {
          window.clearInterval(iv);
        }
      }, 100);

      teardownRef.current = () => {
        window.clearInterval(iv);
        w.Audio = OrigAudio;
        w.__el = undefined;
      };
    } catch (error) {
      console.error("Failed to start:", error);
      teardown();
      setIsConnecting(false);
    }
  }, [status, isConnecting, cachedUrl, getSignedUrl, teardown]);

  const stopConversation = useCallback(() => {
    teardown();
  }, [teardown]);

  const isConnected = !!convoRef.current;
  const sdkLoading = status !== "ready";

  return (
    <div className="flex flex-col items-center gap-4">
      <MascotRive />

      <button
        onClick={isConnected ? stopConversation : startConversation}
        disabled={isConnecting || sdkLoading}
        className="px-6 py-3 rounded-lg font-medium text-white bg-blue-600 hover:bg-blue-700 disabled:opacity-50"
      >
        {sdkLoading
          ? "Loading SDK…"
          : isConnecting
          ? "Connecting..."
          : isConnected
          ? "End Conversation"
          : "Start Conversation"}
      </button>
    </div>
  );
}
That's the core integration. When the user clicks "Start Conversation," the SDK creates a Web-Audio tap, ElevenLabs opens its WebSocket and starts playing the agent's voice, the SDK attaches the tap to that hidden <audio> element, and lip sync runs automatically from the tapped MediaStream.
Why create the tap synchronously in the click? A browser only lets you start an
AudioContextinside a user gesture. If you create the tap after anawait, its context is born suspended and produces silence. Create it first, then do your async work. Thewindow.Audiopatch must also be installed beforeConversation.startSessionso you can capture the hidden<audio>ElevenLabs constructs.
Step 4: Configure Natural Lip Sync
Natural lip sync smooths the mouth motion so it doesn't snap robotically to every phoneme — it merges rapid, similar shapes while protecting the distinctive ones. It's a single option on useMascotPlayback, and it works for every path (offline, mic, realtime).
Enable it with the defaults:
const playback = useMascotPlayback({ stream: true, enableNaturalLipSync: true });Or tune it by passing a naturalLipSyncConfig. The one rule that matters: the config must be a stable reference — a module-level constant (as in Step 3) or memoized with useState / useMemo. A fresh object literal on every render reinitializes playback and lip sync breaks after the first audio chunk. This is the single most common integration bug.
// Module scope — defined ONCE, never recreated per render.
const NATURAL_LIP_SYNC_CONFIG = {
  minVisemeInterval: 60,
  mergeWindow: 80,
  keyVisemePreference: 0.7,
  preserveSilence: true,
  similarityThreshold: 0.6,
  preserveCriticalVisemes: true,
} as const;

const playback = useMascotPlayback({
  stream: true,
  enableNaturalLipSync: true,
  naturalLipSyncConfig: NATURAL_LIP_SYNC_CONFIG,
});
CONVERSATION is a sensible default for voice AI. If you want crisper articulation (tutoring, language learning), lower minVisemeInterval and mergeWindow; for fast or excited speech, raise them for coarser merging. The defaults work well for most agents — you rarely need to touch them. See the Natural lip sync reference for every field, its default, and the conversation / fast-speech / educational presets.
Important: Use a module constant or
useStatefor the config object to keep a stable reference. Without it, playback reinitializes after the first audio chunk and the mouth stops moving mid-conversation.
Step 5: Test Your Avatar
Run your development server:
pnpm devOpen localhost:3000, click "Start Conversation," and grant microphone access. You should see:
- The avatar loads and displays your mascot character
- When you speak, the AI responds with synchronized lip movement
- A gesture fires each time the agent starts a new turn
Debugging checklist:
status === "ready"fromuseMascot()— the licensed inference client is initialized; "Start Conversation" only enables once you reach this state- The tapped
MediaStreamis non-null — thewindow.Audiopatch must be installed beforeConversation.startSession, and the hidden element'ssrcObjectmust be aMediaStreamwith at least oneliveaudio track before youtap.attach(el) - No mouth movement? — Confirm the Rive file uses artboard
Characterand state machinemascotStateMachine(Rive 2.37+ throws on an unknown state-machine name and renders a blank canvas) - Avatar not loading? — Check that your
.rivfile is in yourpublic/folder and thesrcpath matches - Hearing the voice twice? — You routed ElevenLabs through
createPCMStreamPlayer. ElevenLabs self-plays; tap its audio instead, never the PCM player
Choose Your Mascot: Three Paths
Not everyone needs the same level of customization. Here are your options:
Path 1: Ready-to-Use Mascots
Pick from four characters available out of the box:
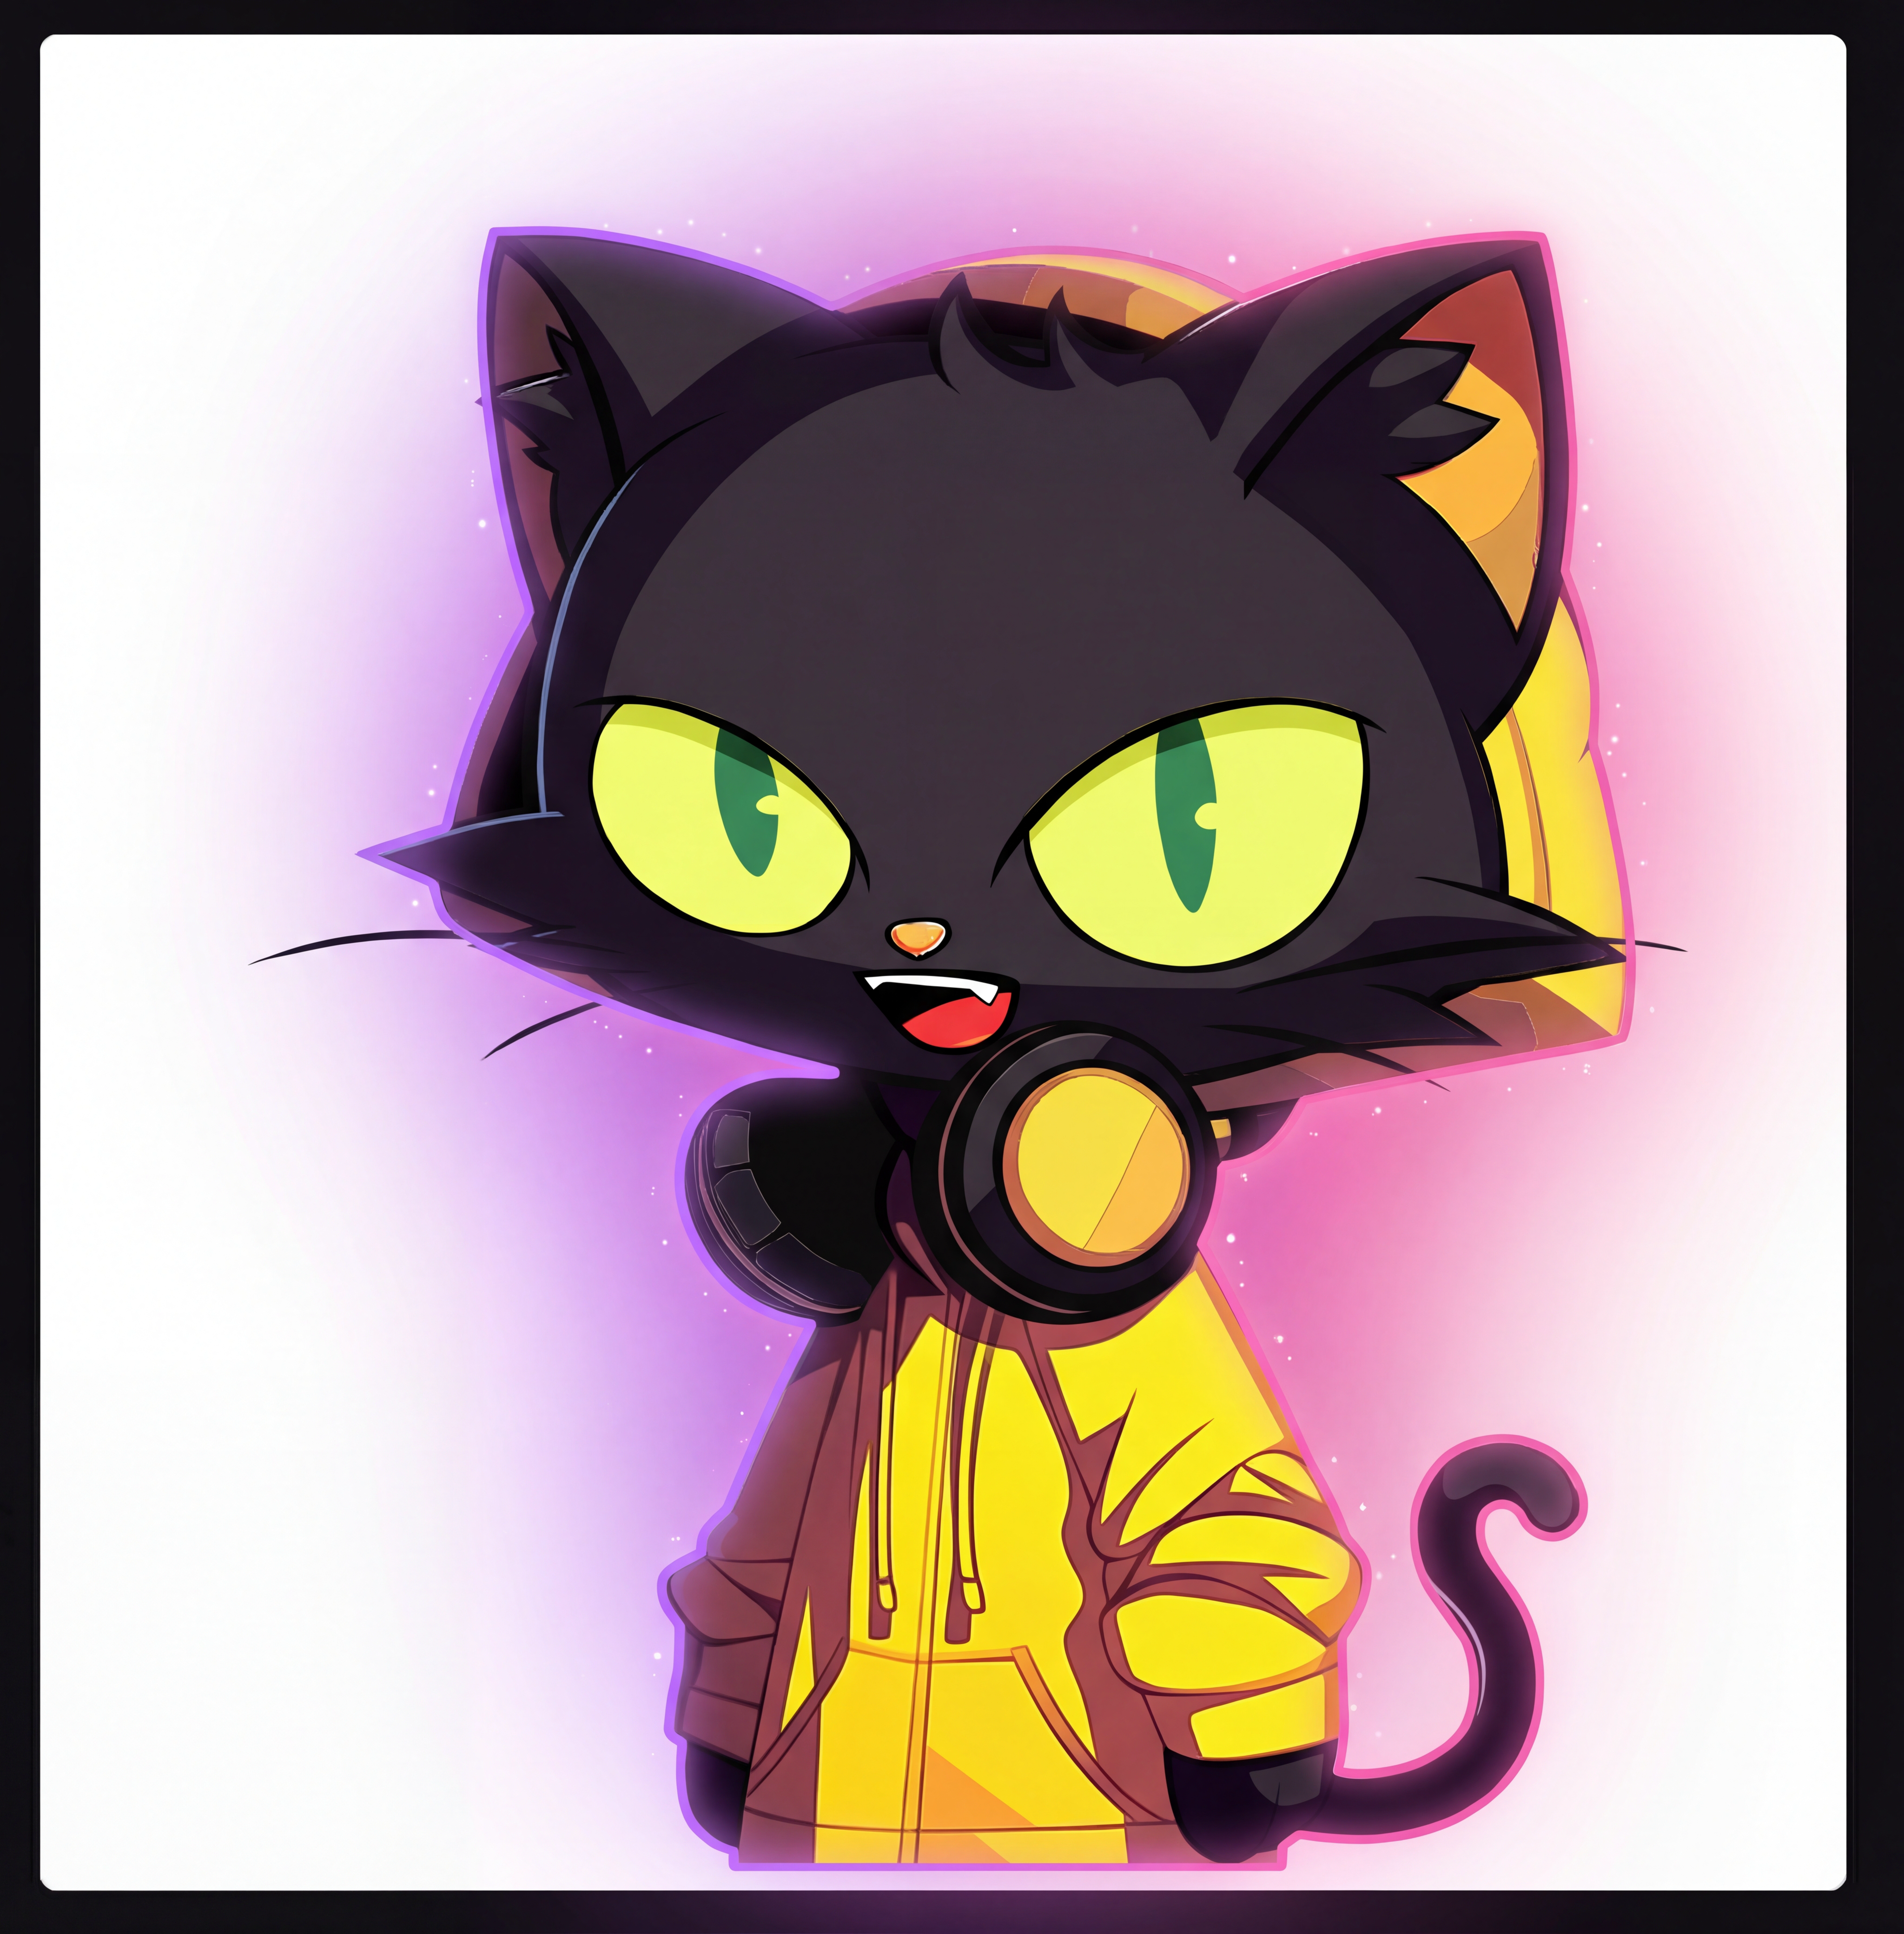 | 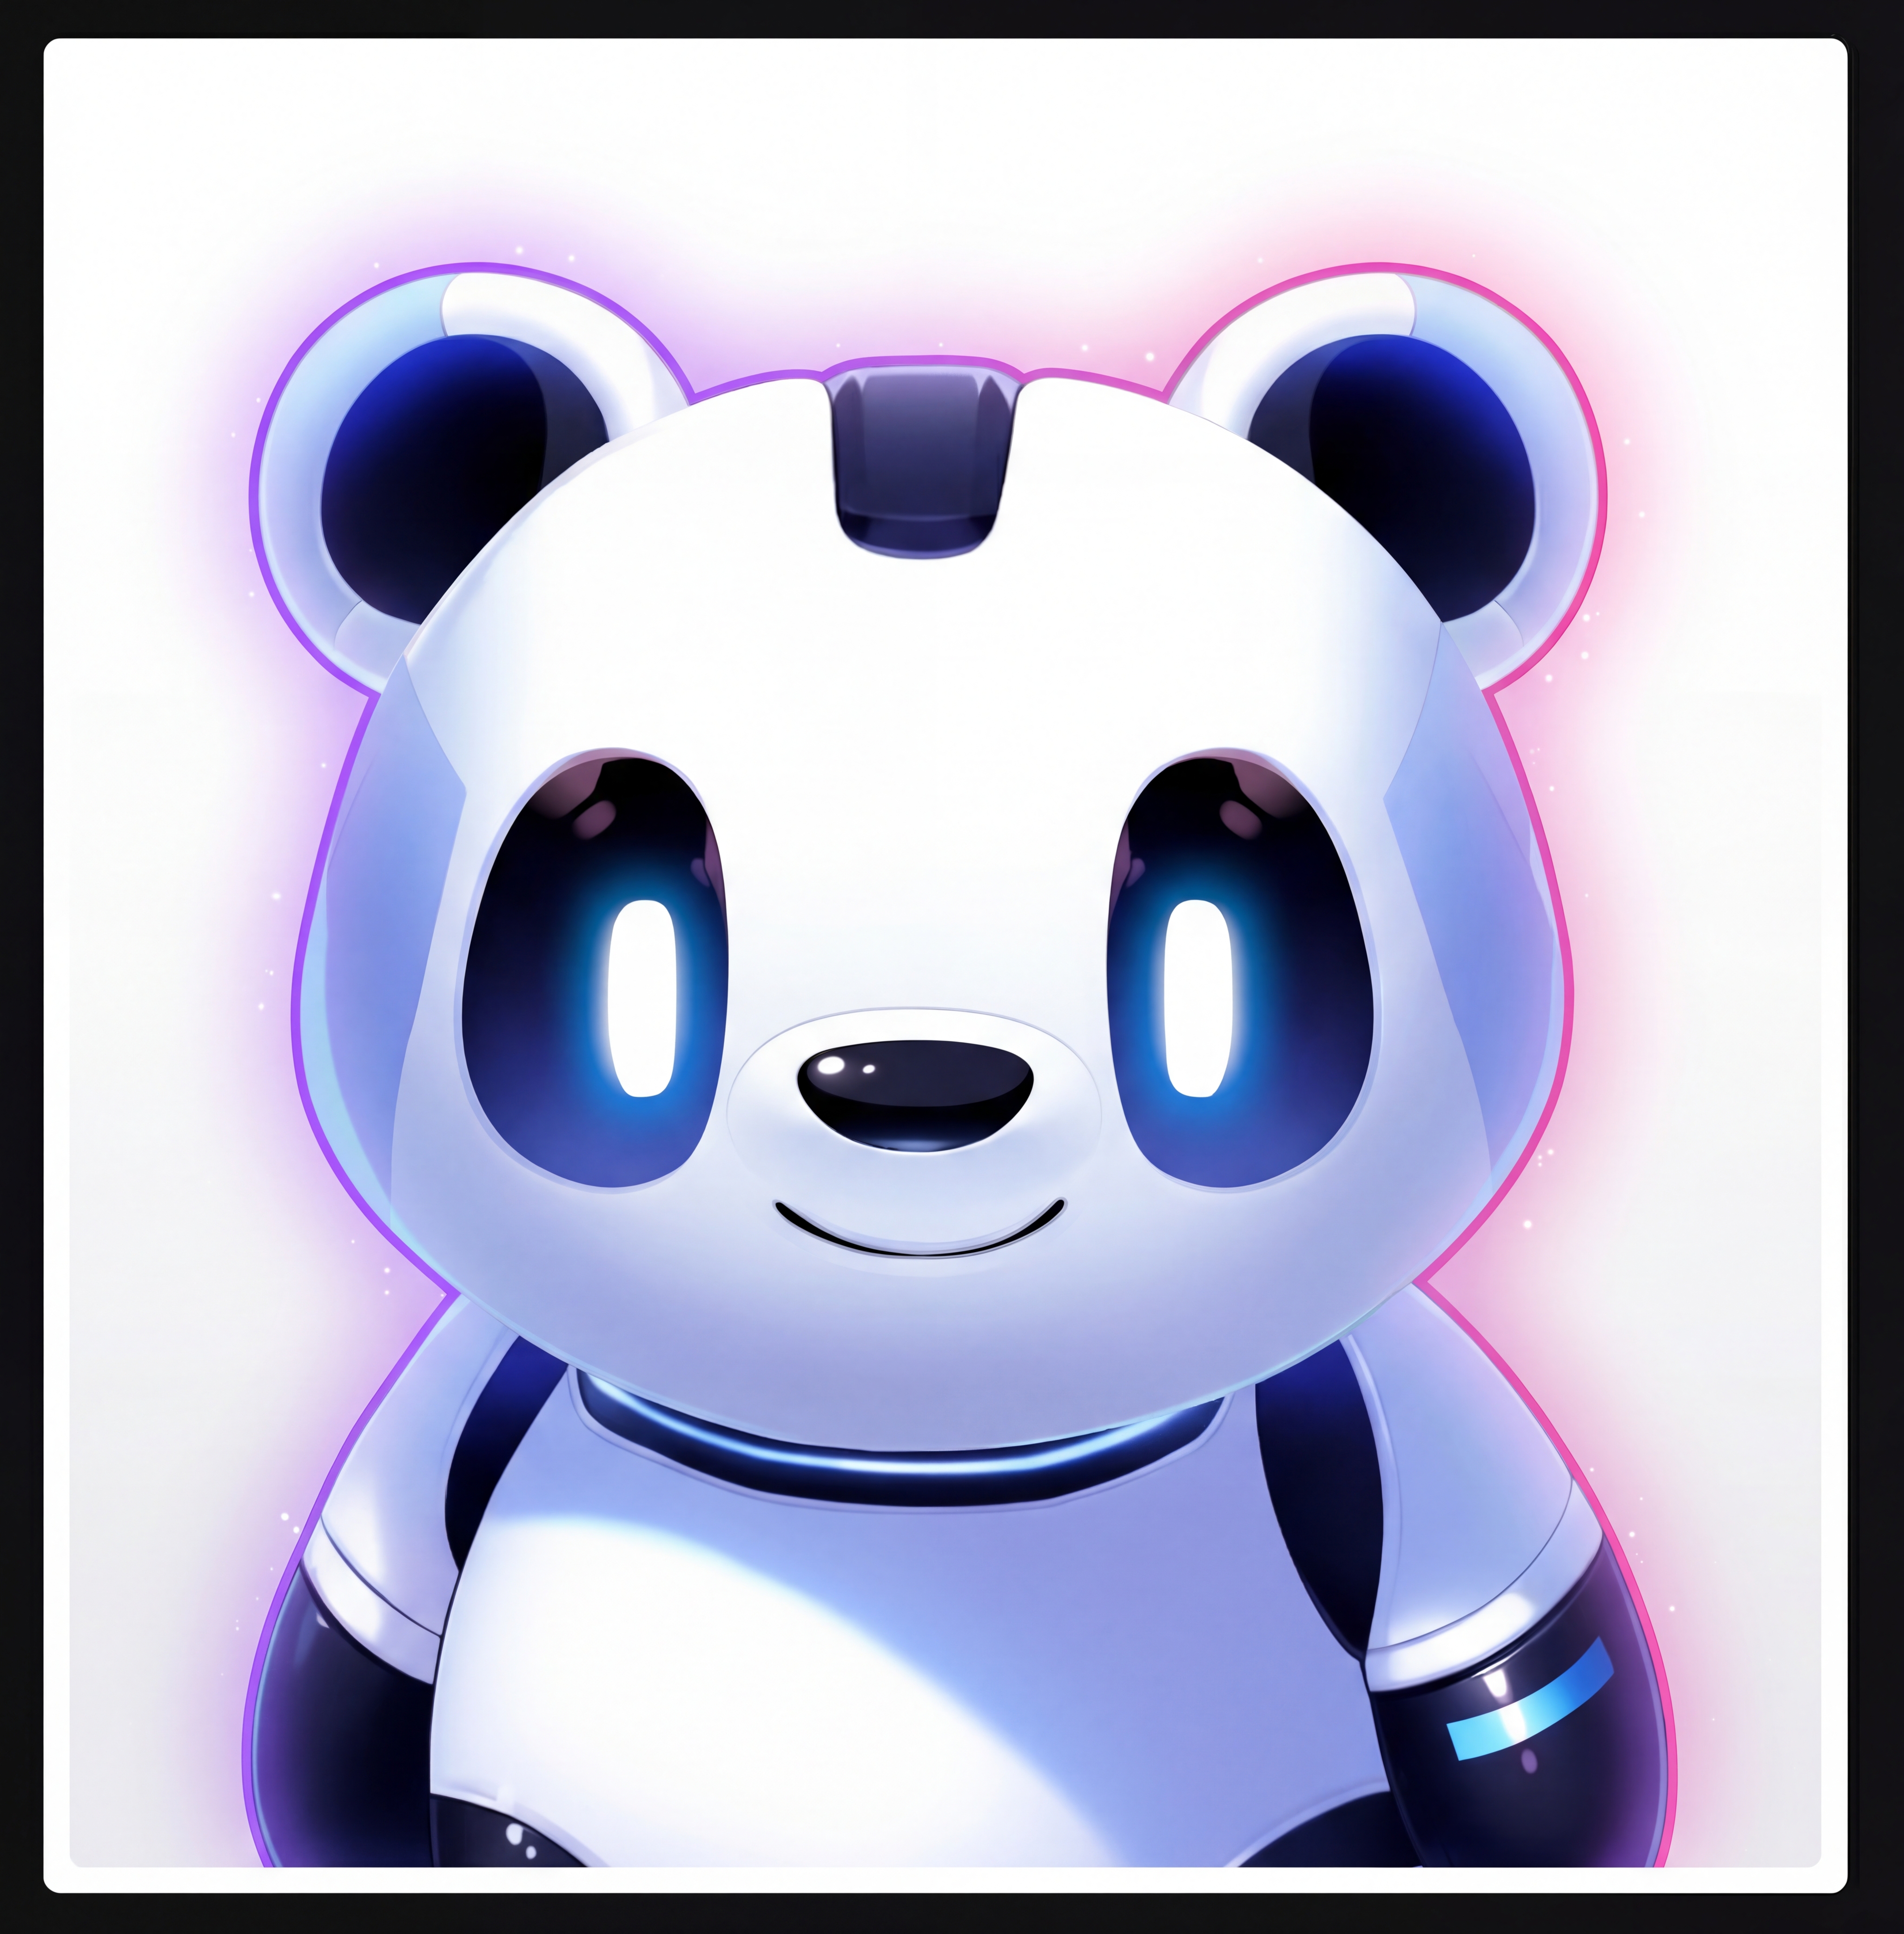 | 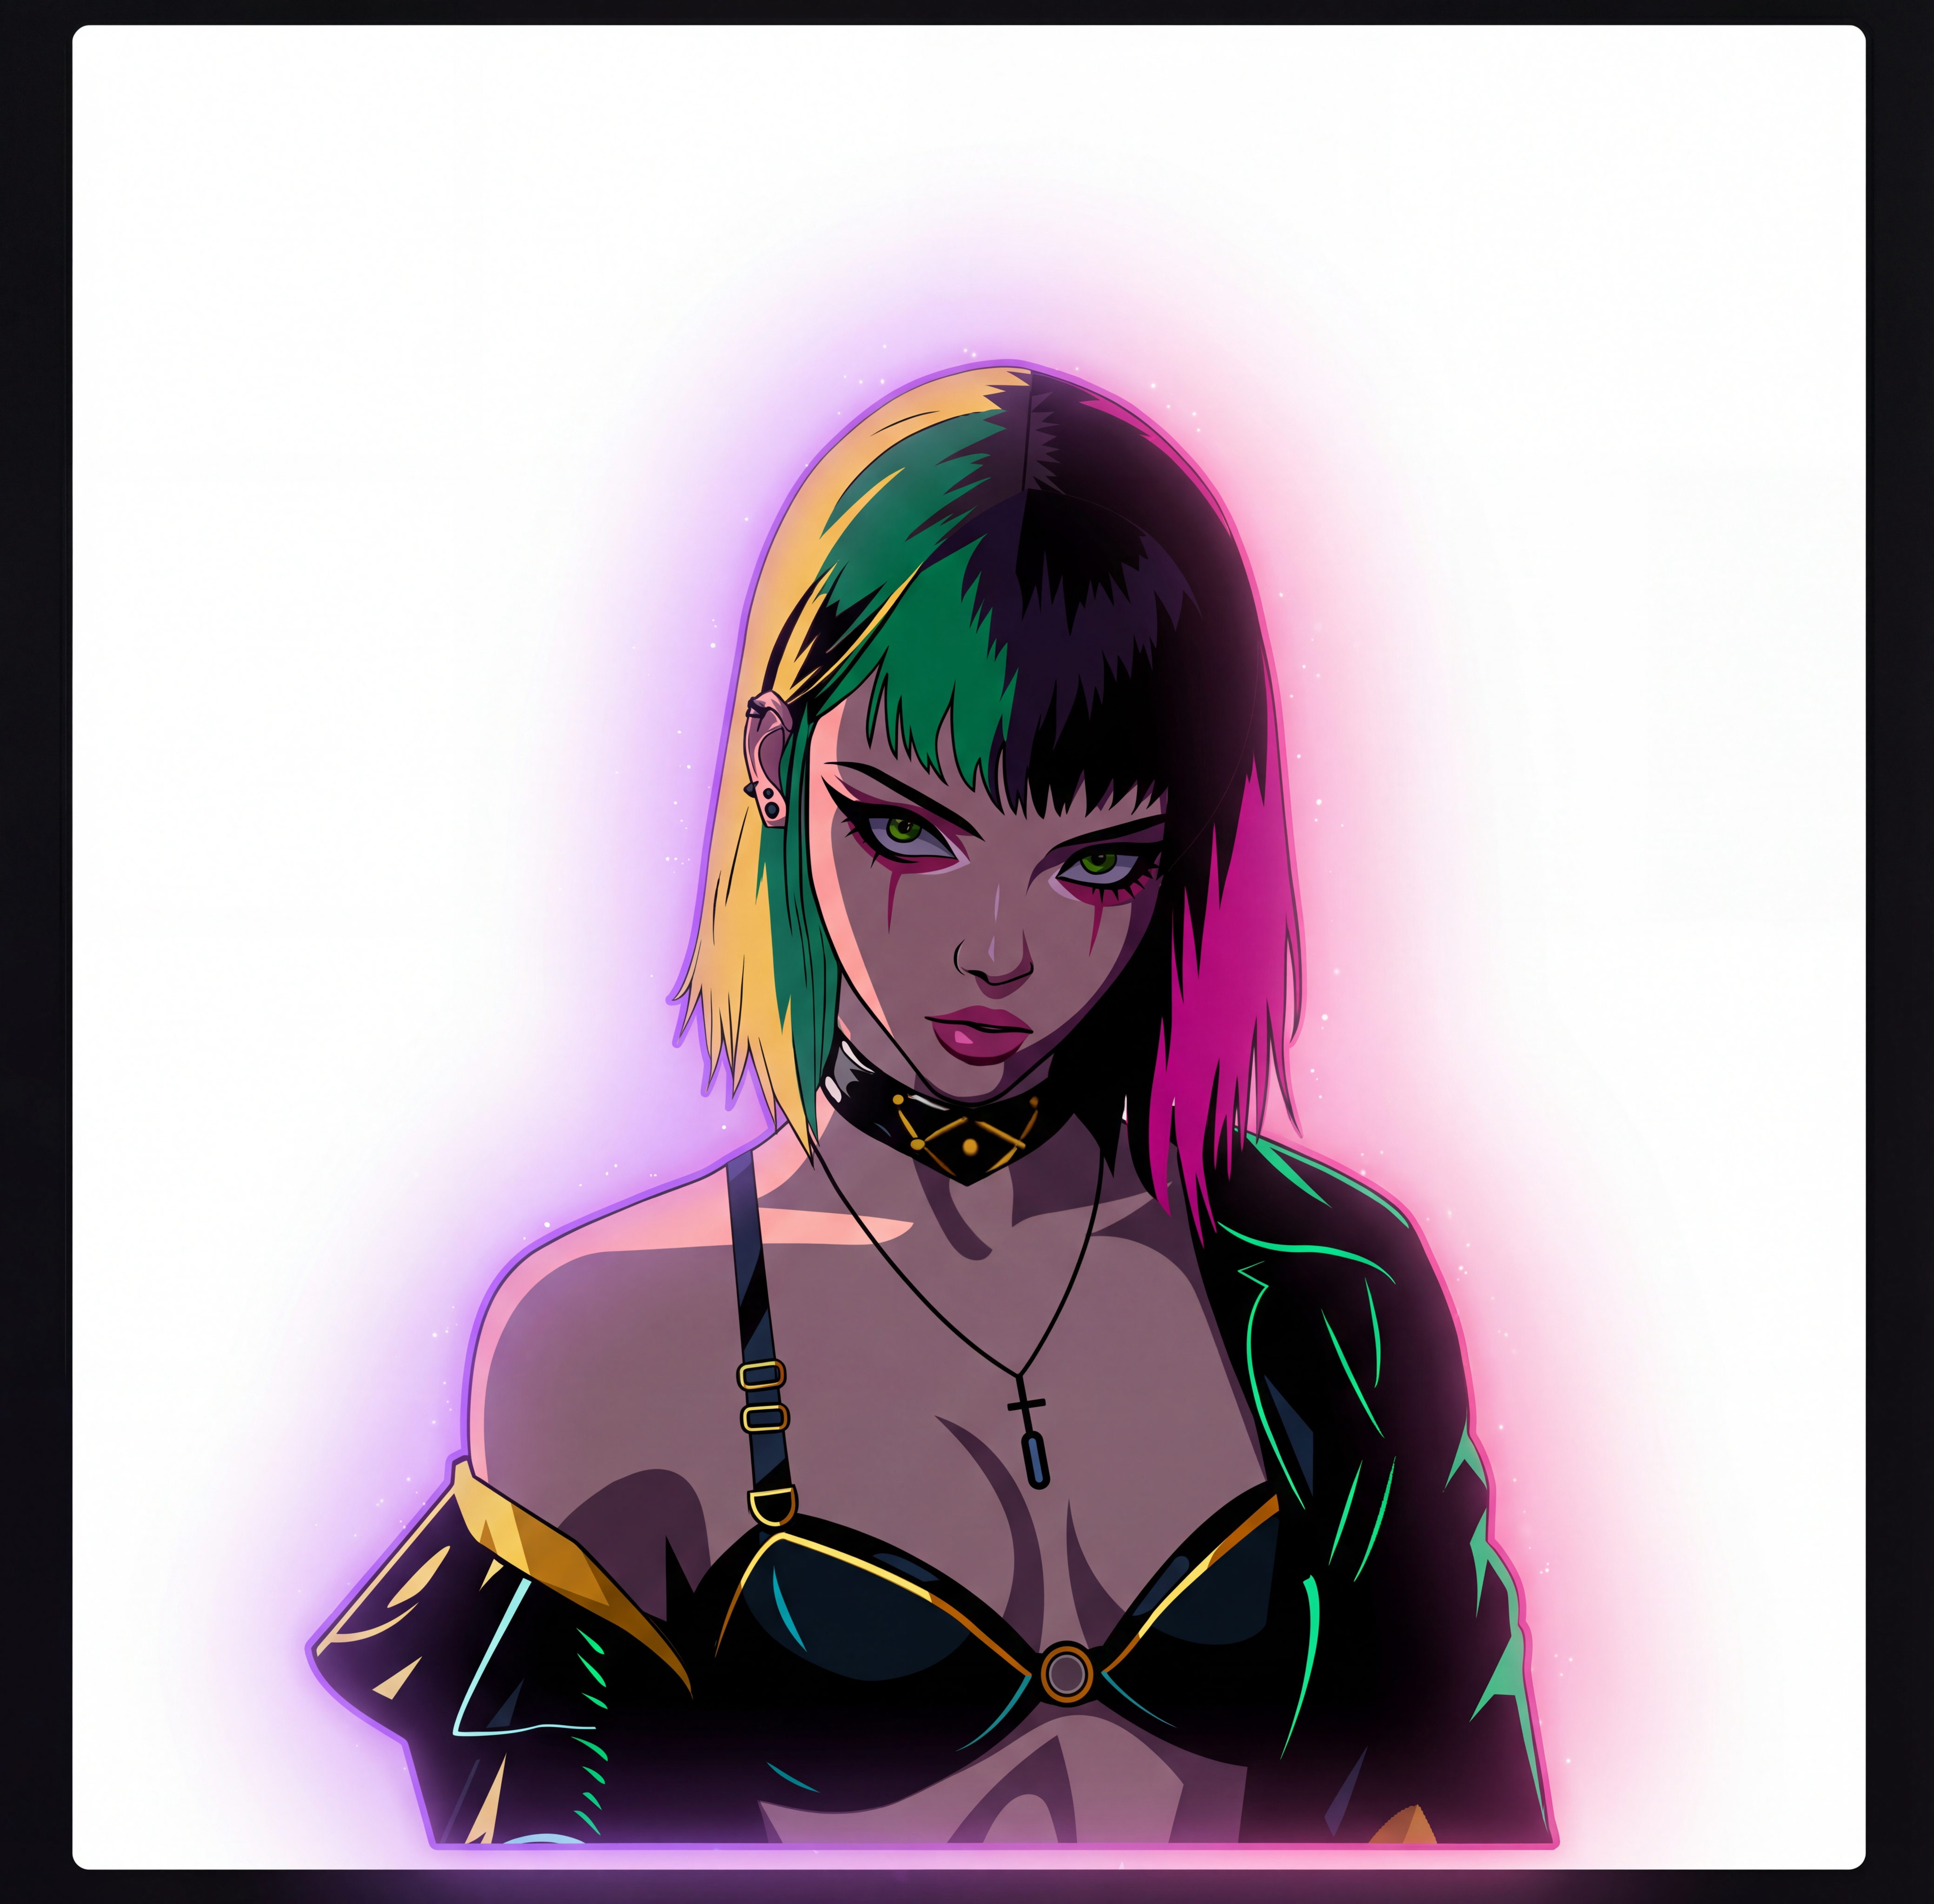 | 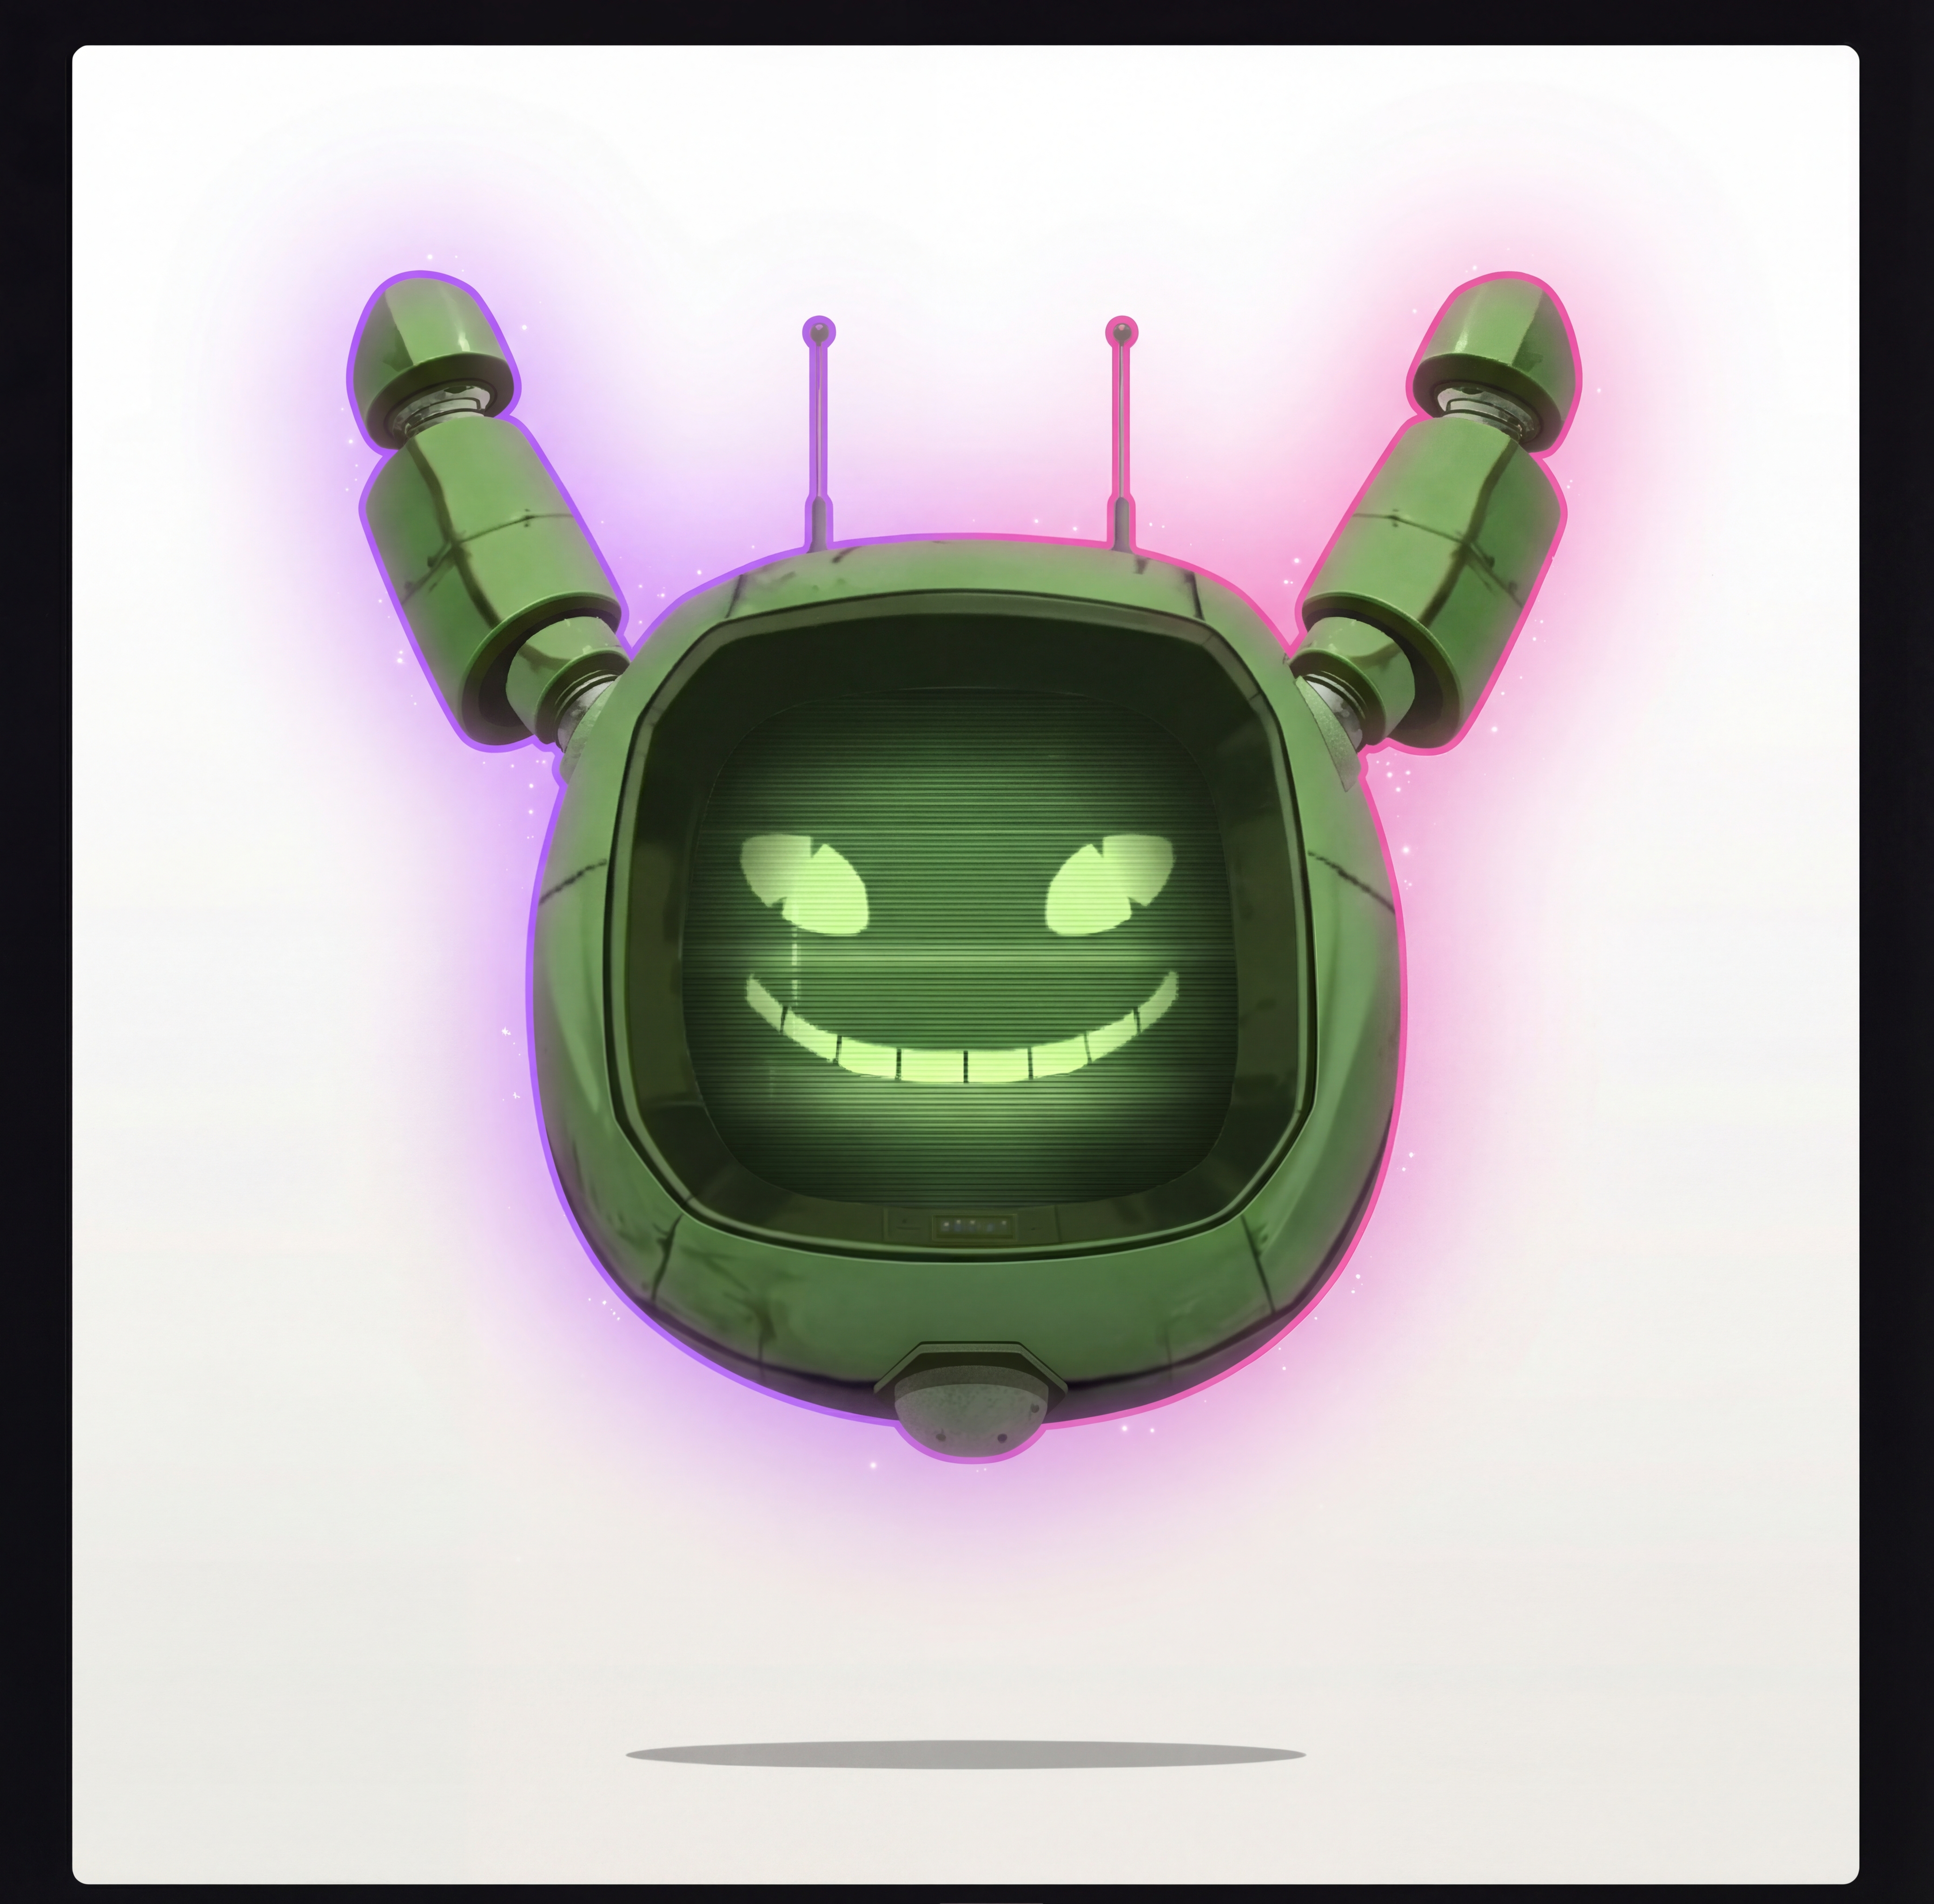 |
| Cat | Panda | Girl | Robot |
| Playful black feline with bright yellow eyes | Friendly futuristic panda with robotic edge | Stylish cyberpunk-inspired young woman | Retro-modern floating robot with expressive screen |
| Gaming, tech brands, creative agencies | Family-friendly, AI products, education | Fashion, entertainment, futuristic products | Tech startups, e-learning, support |
Choose one, get the .riv file with your subscription, drop it in public/, and you're live in 5 minutes.
Path 2: DIY Custom Character
Want your own brand character? Here's the process:
- Design — Use Nano Banana to generate character concepts from text prompts
- Animate — Create or commission a Rive file with the
Characterartboard, themascotStateMachinestate machine, the mouth viseme inputs, and any consumer inputs you want (likegesture) - Upload — Place the
.rivfile in yourpublic/folder - Configure — Point
<Mascot src>at your file and declare your custominputs={[...]}
Best for teams that want a unique brand identity. Budget 1-2 weeks for character design and animation. Full walkthrough in the custom brand mascot guide.
Path 3: Custom Character (Done-for-You Service)
The Mascotbot team handles everything:
- Character design based on your brand guidelines
- Professional Rive animation with all required states
- Lip-sync mapping and SDK integration support
- Delivery: 2-4 weeks
Best for companies that want a hands-off solution. Contact the Mascotbot team with your brand guidelines.
When NOT to Use This
Be honest about the right tool for the job:
- Pre-rendered marketing videos — Platforms like HeyGen generate polished video content, but expect to pay $100+/hour and accept 2-5 second latency. Not suitable for real-time interaction.
- Photo-to-video avatars — Services like D-ID animate real photos, but the uncanny valley effect is noticeable and they don't support custom 2D brand characters.
- 3D photorealistic avatars — Enterprise platforms like Synthesia offer pre-rendered 3D avatars at $1,000+/month. Impressive for video production, but not real-time and not interactive.
Mascotbot is purpose-built for real-time 2D animated characters with lip sync. If that's what you need, nothing else in the current market does it as well.
FAQ
Does ElevenLabs have avatars?
ElevenLabs focuses on voice AI and does not provide avatar rendering natively. To add an ElevenLabs avatar, use a third-party SDK like Mascotbot, which provides real-time lip-synced 2D characters. It runs alongside the official @elevenlabs/client — you keep your ElevenLabs setup exactly as-is, and the SDK lip-syncs whatever the agent says.
How does lip sync work without native viseme data?
ElevenLabs doesn't emit viseme (mouth-shape) data, so the SDK derives them itself with a hybrid architecture. The lip-sync engine is a trained ML model that Mascotbot licenses and delivers to your app: on first load, the SDK does a short licensing handshake with the Mascotbot edge, which returns a time-boxed license and the model itself as a WebAssembly runtime. From then on the model runs on-device — it taps ElevenLabs' exact playback as a MediaStream (using createElementTap) and infers a viseme roughly every ~10ms frame in the browser. Because the audio is captured at its playback point, the mouth can't run ahead of the voice. Your audio and the inferred visemes never round-trip to a Mascotbot server — the edge handles only the one-time license + model delivery and usage metering, and there is no proxy in the audio path.
What latency should I expect?
The audio-to-visual delay is sub-10ms because the capture point is the playback point: the SDK animates the mouth from the same audio your user hears, with viseme inference running locally per ~10ms frame. The Rive engine renders at up to 120fps with less than 1% CPU overhead. Total end-to-end latency depends on your network and ElevenLabs response time; the avatar layer itself adds negligible overhead.
Can I use my own backend or LLM?
Yes. Mascotbot handles only the visual layer — avatar rendering and lip sync. The lip-sync model is licensed and delivered from the Mascotbot edge once on load, then runs on-device, so your audio never round-trips. Your voice AI provider (ElevenLabs), LLM, and backend logic remain unchanged. The SDK never sits between your app and ElevenLabs — it taps the audio ElevenLabs plays and infers visemes locally; the edge only authorizes the license, delivers the model, and meters usage, never your audio.
What browsers are supported?
Any modern browser with WebGL2 support: Chrome 56+, Firefox 51+, Safari 15+, Edge 79+. The SDK taps playback with createElementTap, which works cross-browser including Safari (where HTMLMediaElement.captureStream() is unavailable). Microphone access permission is required for voice interaction.
Next Steps
You've added a lip-synced animated avatar to your ElevenLabs voice agent. Your users now have a face to talk to.
Resources:
elevenlabs-avatar
Full example repository for this tutorial — ElevenLabs voice agent with real-time lip-synced Mascotbot avatar. Clone and run locally.
- SDK documentation — complete API reference
- SDK Quick Start guide — your first talking avatar in 10 minutes
- Create your own brand mascot — design and animate a custom character
- Ready-to-use mascots gallery — browse available characters
- Get your API key — sign up at the Mascotbot dashboard


